
What exactly is Azure API Management platform - Part 2
Let's start by creating a simple web api in .Net Core 6. Name the project as "WebAPI1" (please use only this name for the project. You will see how it is important in some time). Now add a new controller "ValuesController" & add below code

In the previous article we had gone through some of the challenges which are faced during API development & what can be done to better address them. If you have not read that one yet, I would suggest to give it a go first. Click here to visit it.
So below were the challenges & resolutions which we talked about in previous article -
- A policy which can be applied to all the API's from a single place without any code changes.
- The teams should be working in parallel i.e. A team should not wait long to start it's API work which is dependent on other team's API completion.
- The team members should be able to understand the APIs details without being dependent on any documentation or other member's involvement.
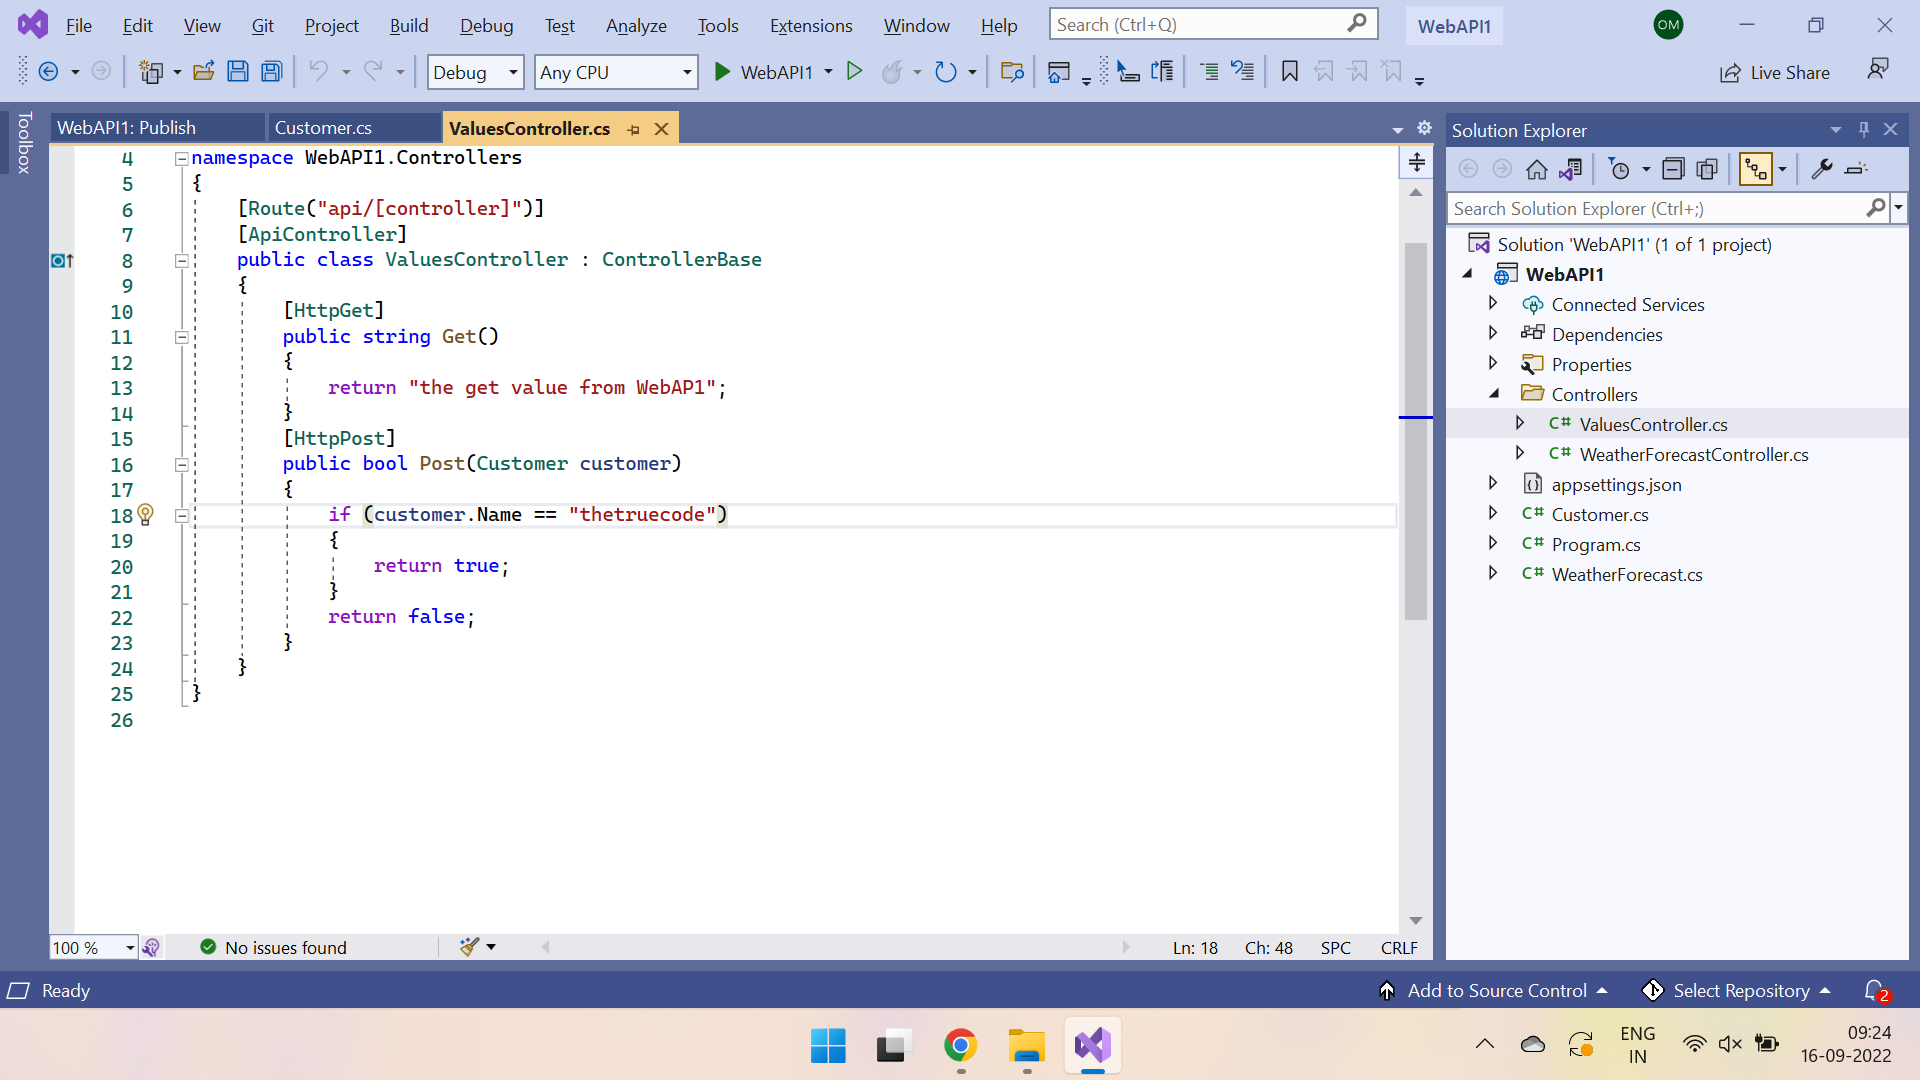
Ok. Let's start by creating a simple web api in .Net Core 6. Name the project as "WebAPI1" (please use only this name for the project. You will see how it is important in some time). Now add a new controller "ValuesController" & add below code -
       [HttpGet]
        public string Get()
        {
            return "the get value from WebAP1";
        }
        [HttpPost]
        public bool Post(Customer customer)
        {
            if (customer.Name == "thetruecode")
            {
                return true;
            }
            return false;
        }
Here is a screenshot of the project to avoid confusion -
Now go to your Azure account & create following resources -
- App service for the deployment purpose. Make sure to use free app service plan so that you don't run into any pricing issues later. Click here to see the pricing details.
- API Management service. Make sure to use consumption plan so that you don't run into higher pricing issues later. Click here to see the pricing details.
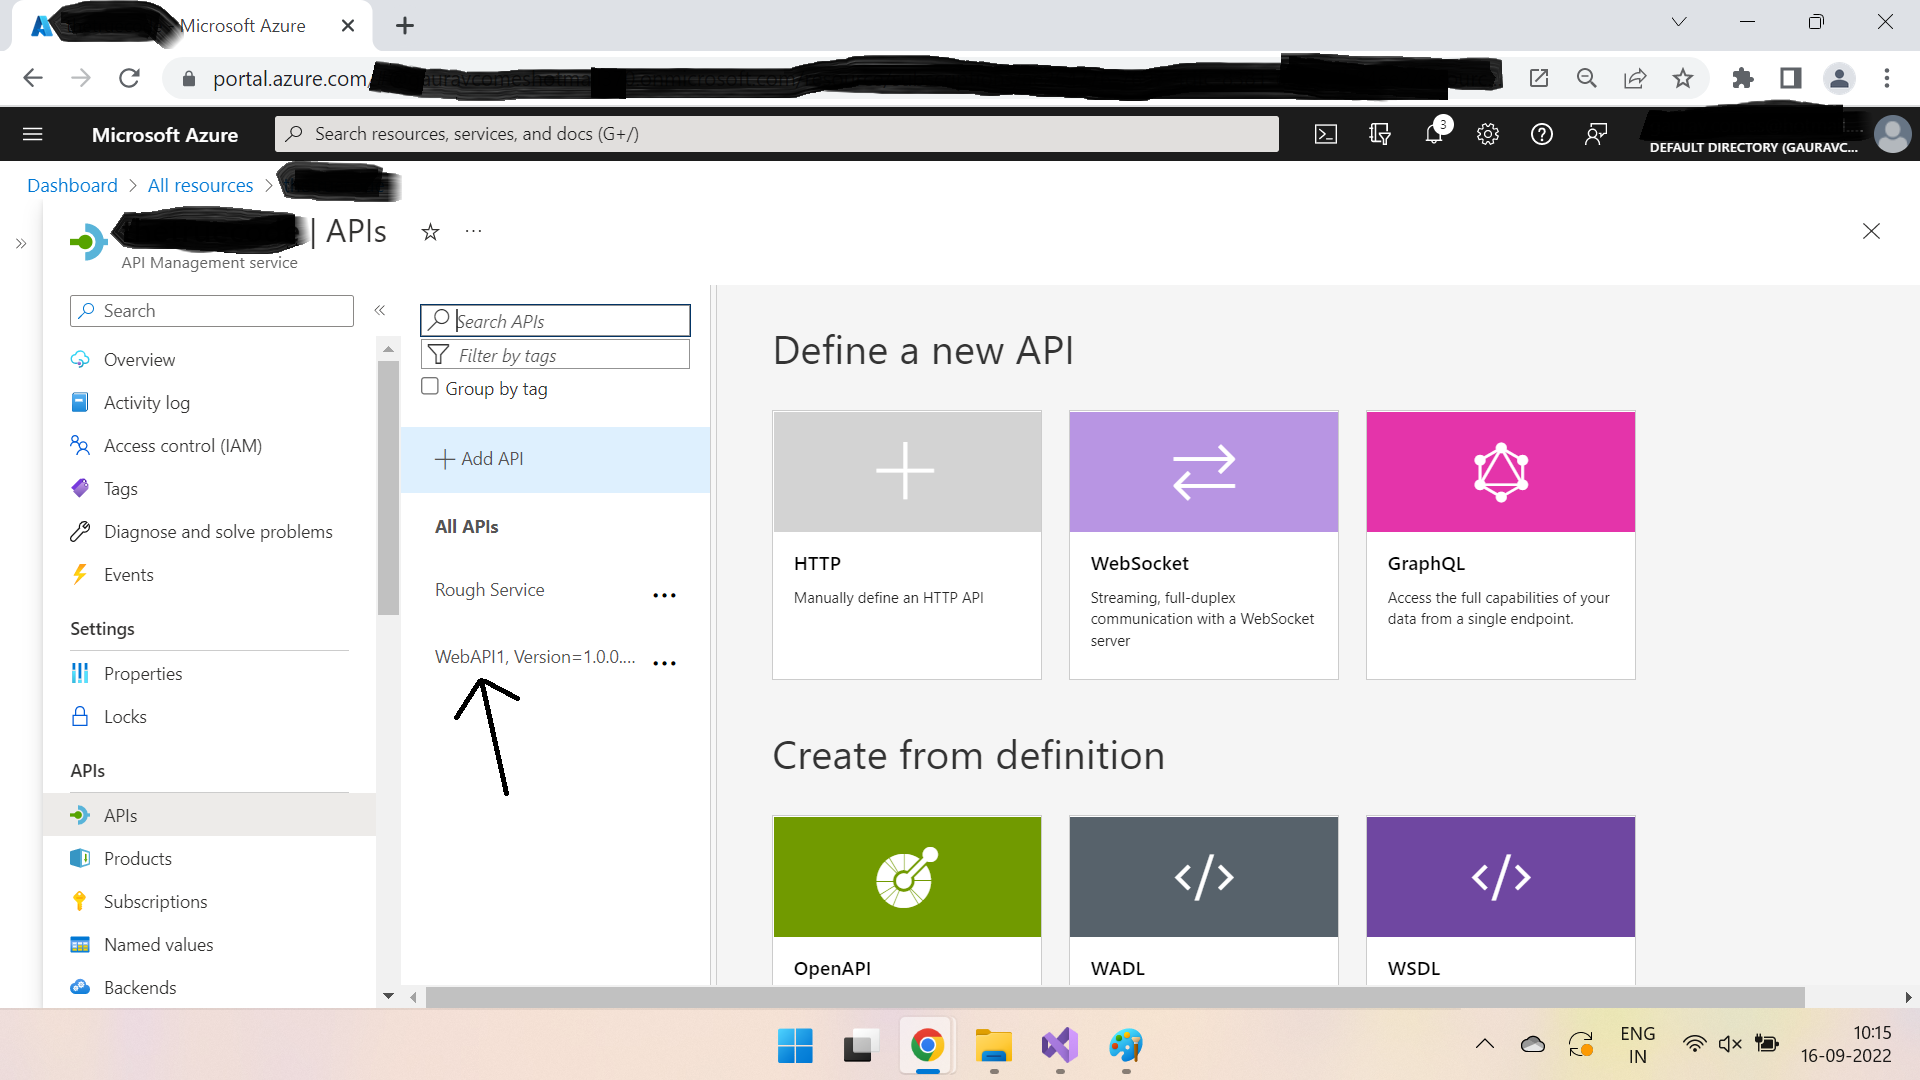
Open the API Management service resource you have created & you see somewhat similar to below screen -
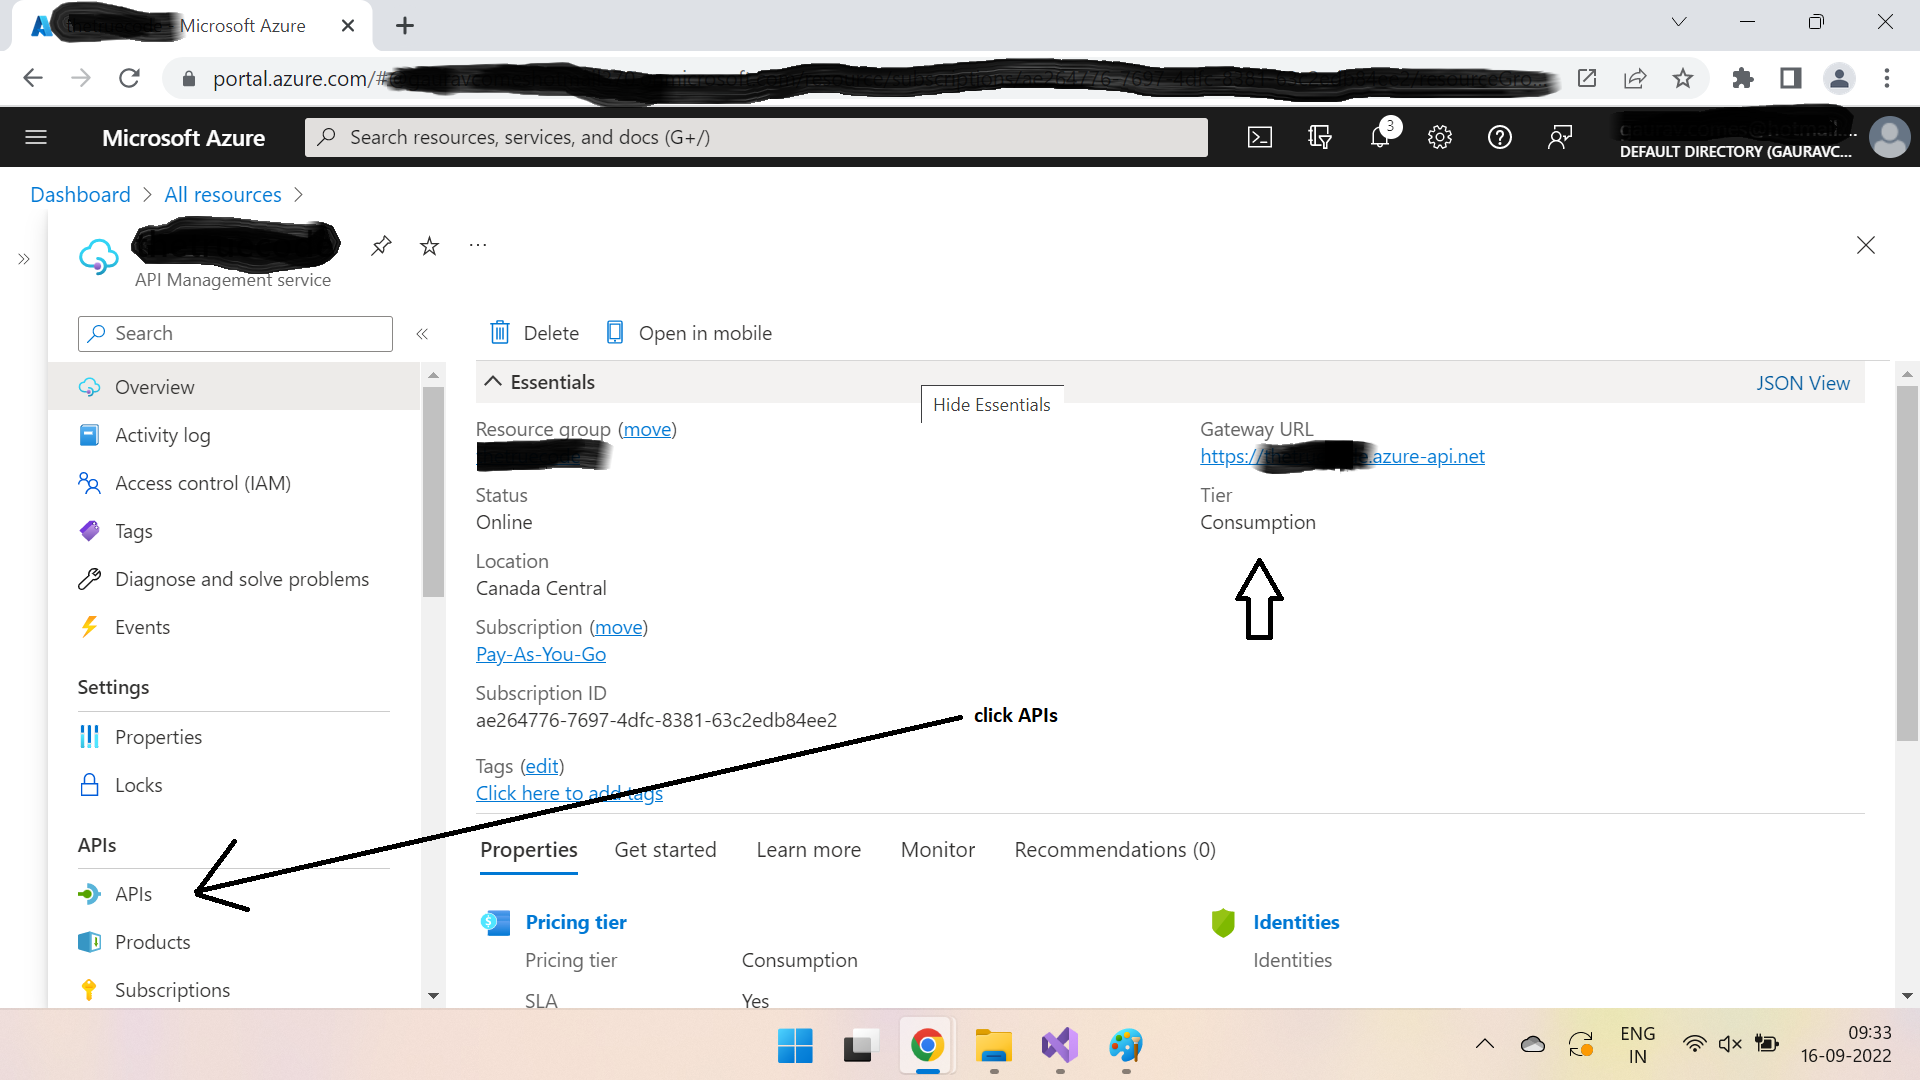
Now click on APIs as shown in above pic & you will see below screen -
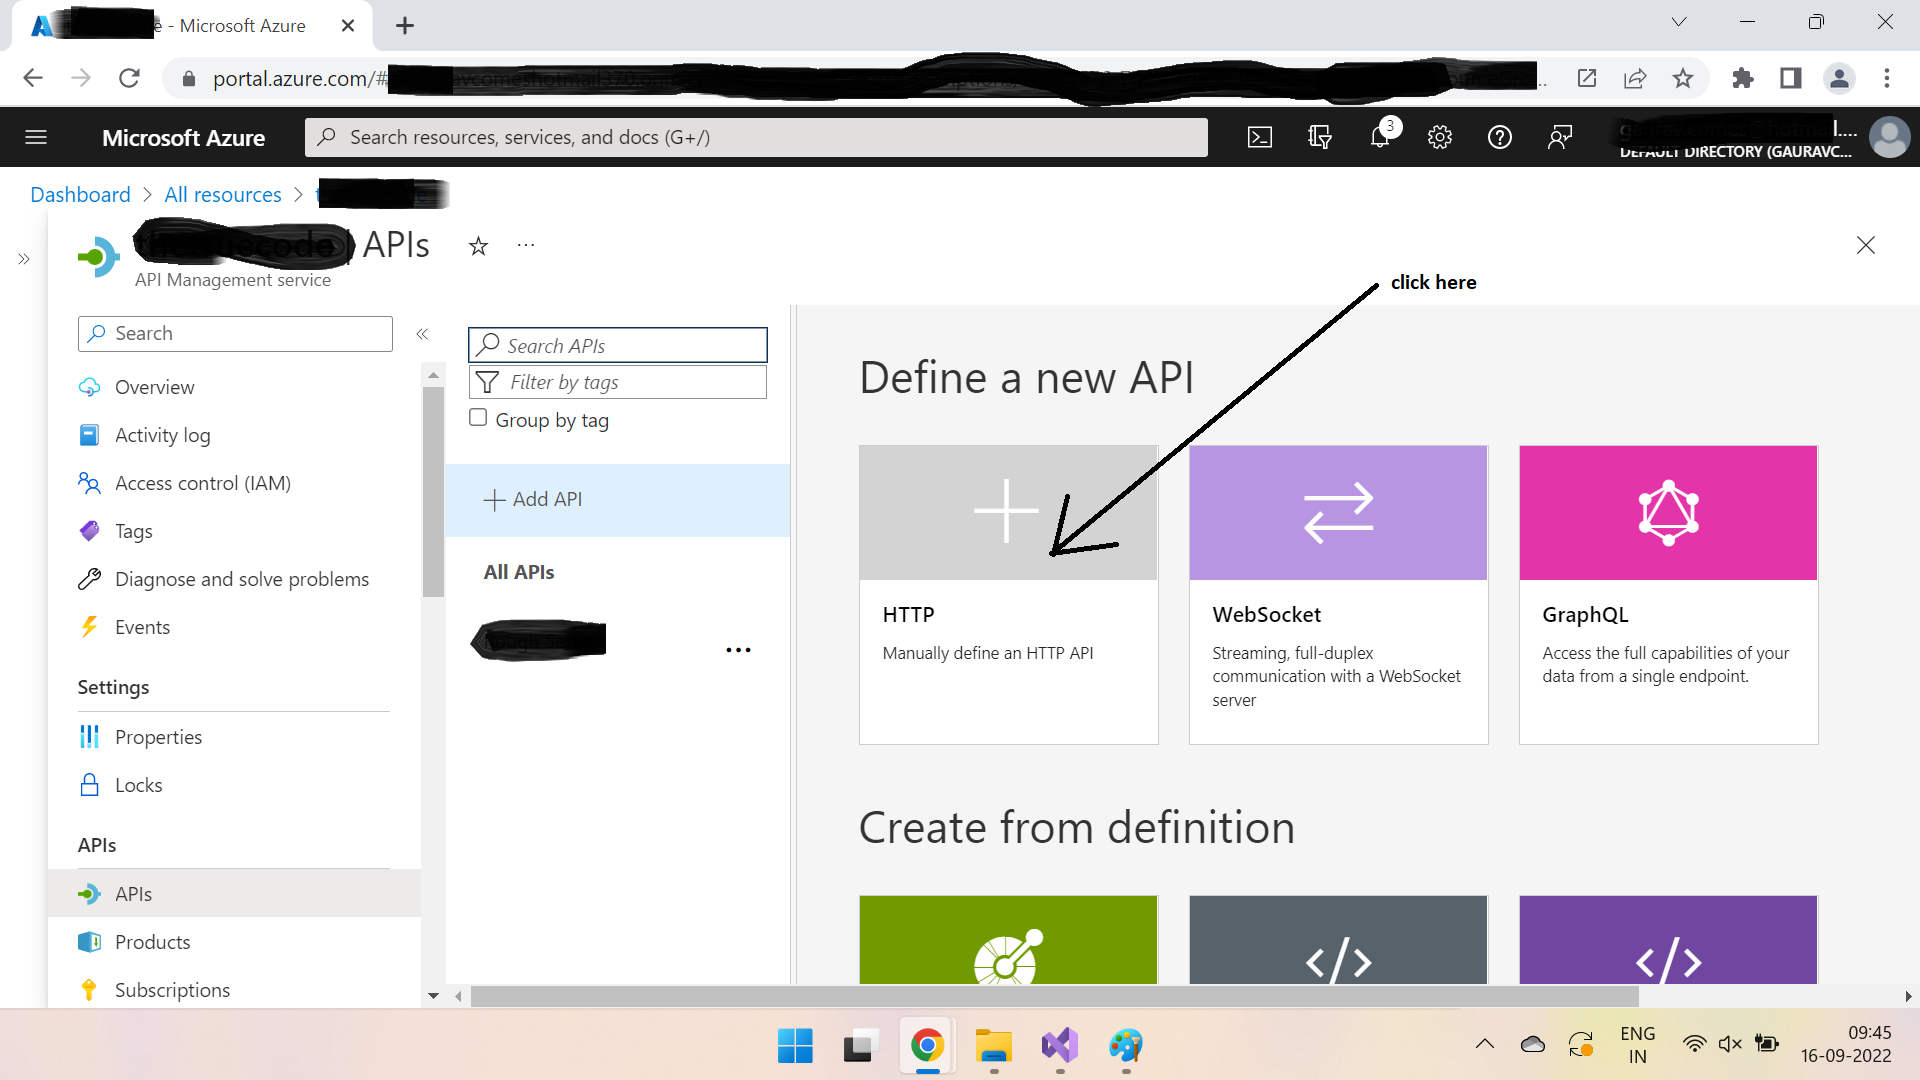
Click on HTTP section as shown in above pic & you will see below screen -
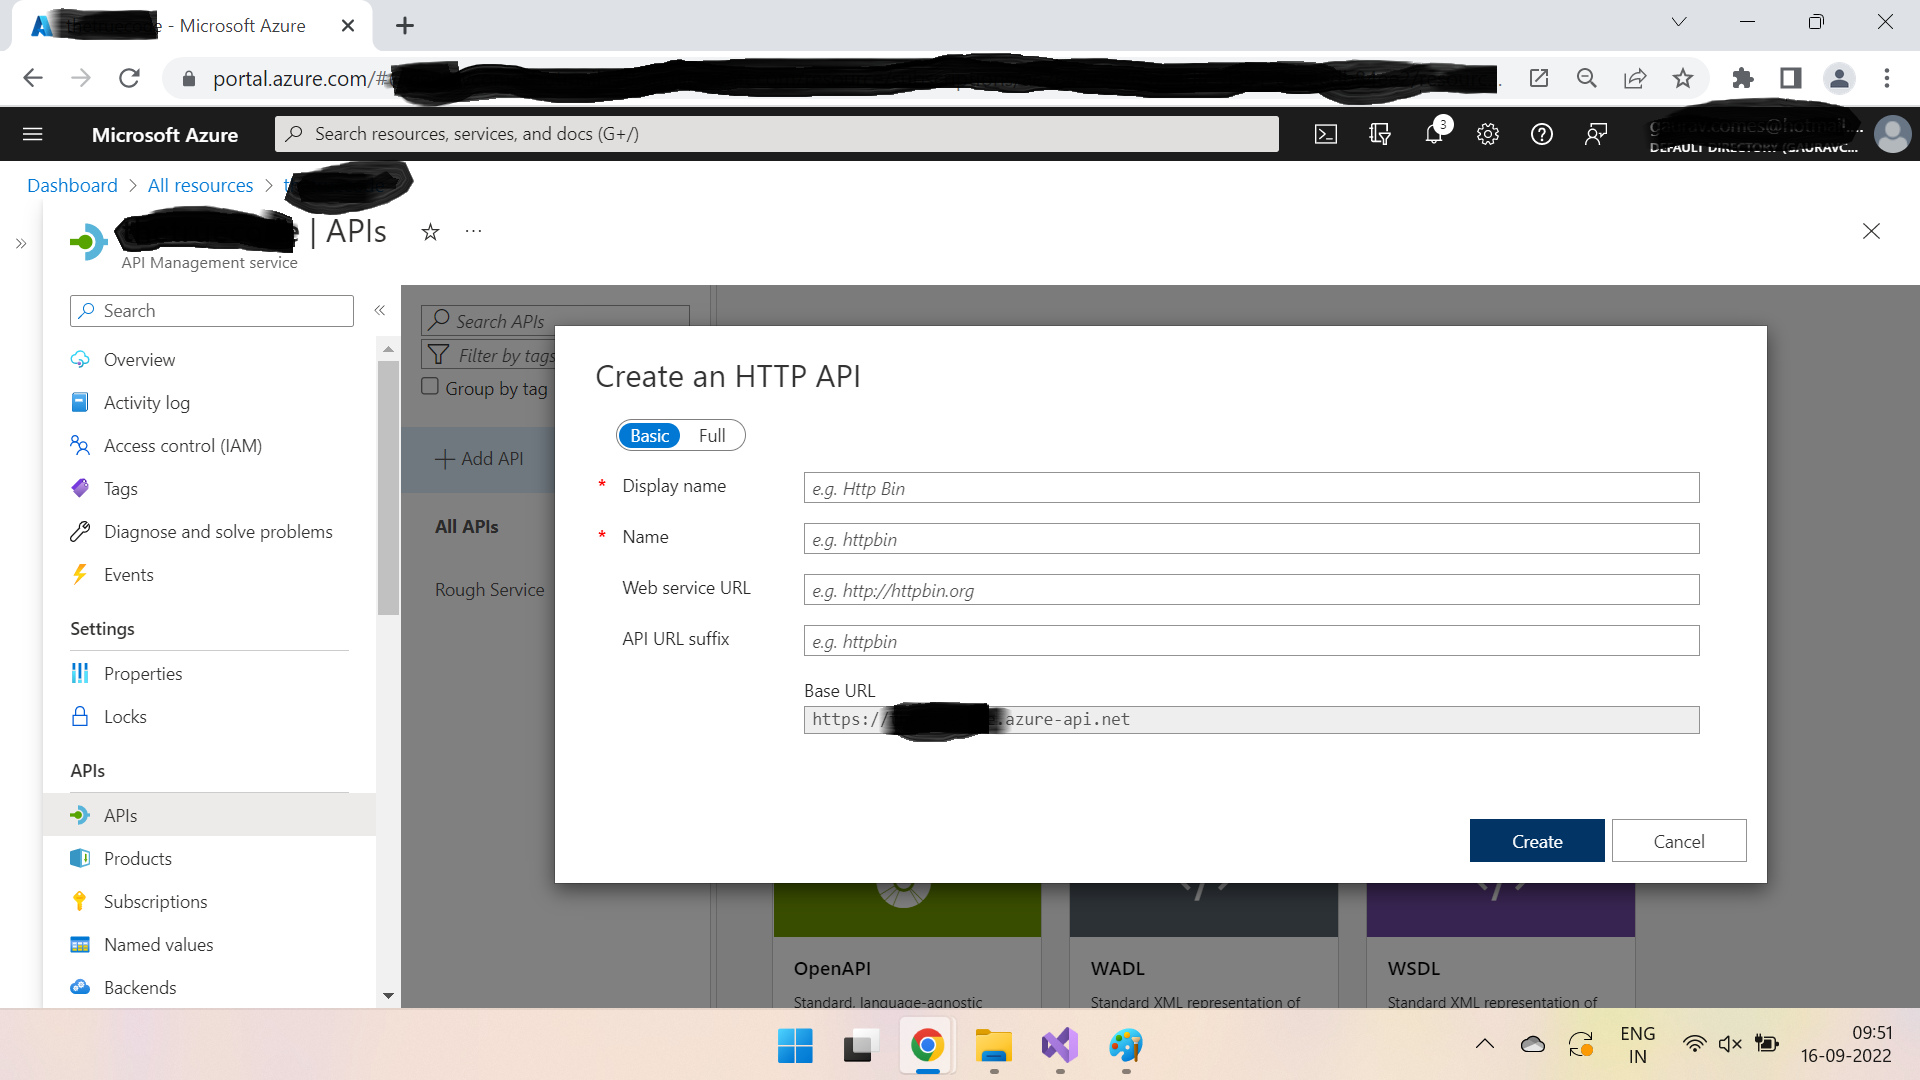
Provide a name for the API. Let's put Customer API as a Display name & keep rest of the fields as defaults. Below is the screenshot for clarity -
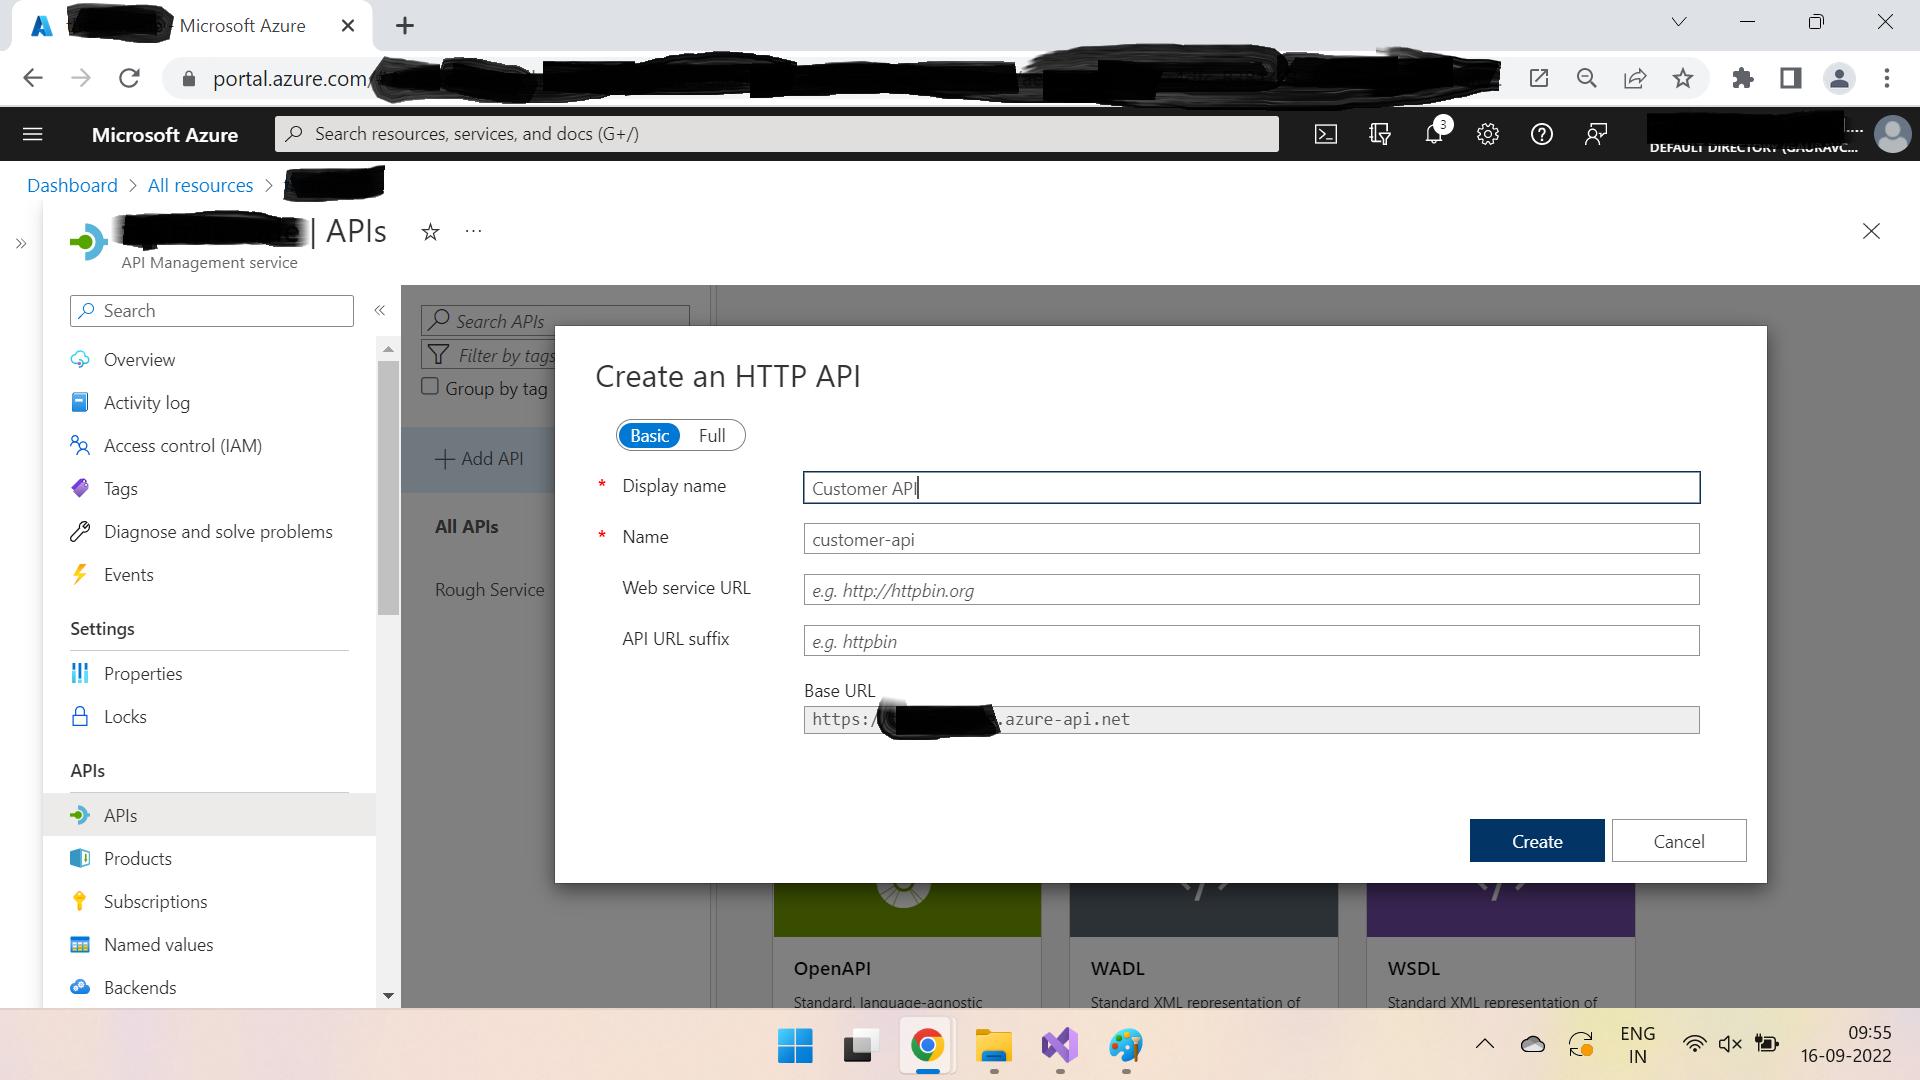
Click on Create & it will show as below -
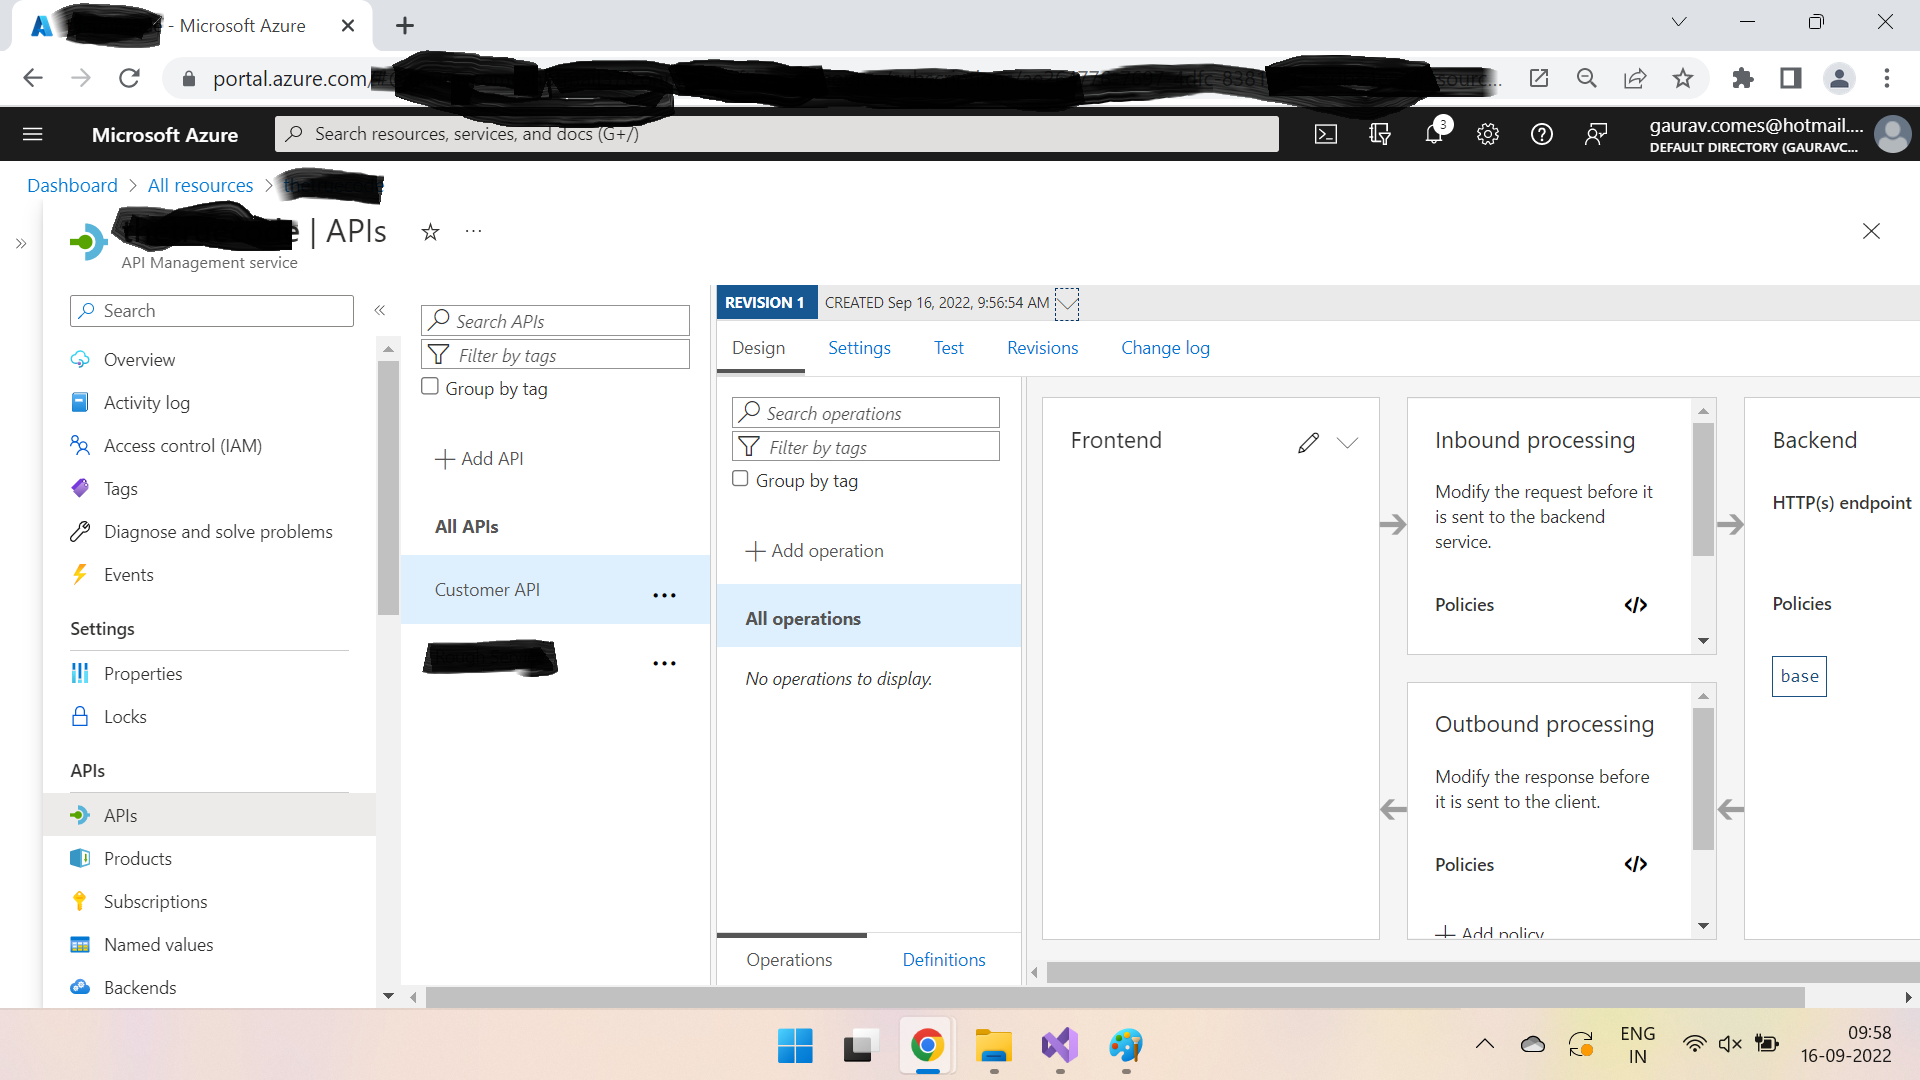
An empty API placeholder is created in API management service. Now go to your .Net project & publish it from VS -
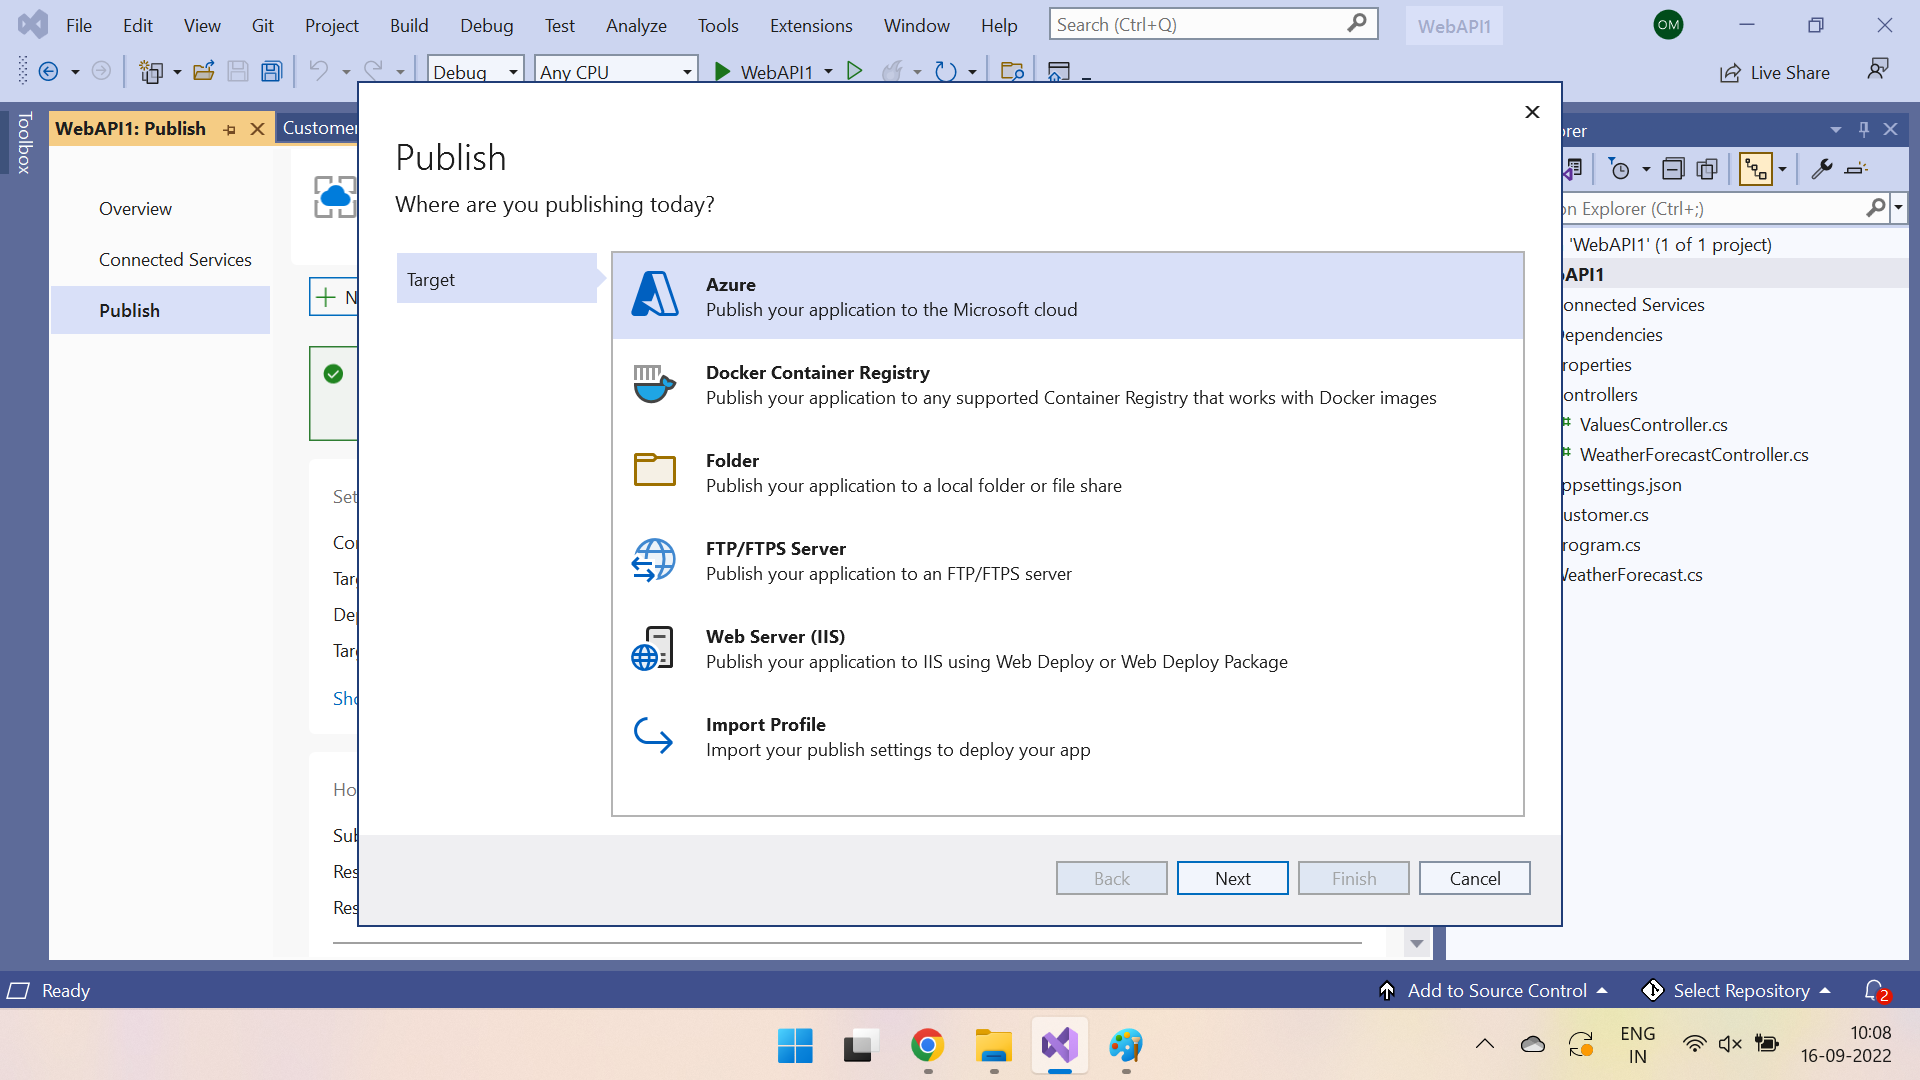
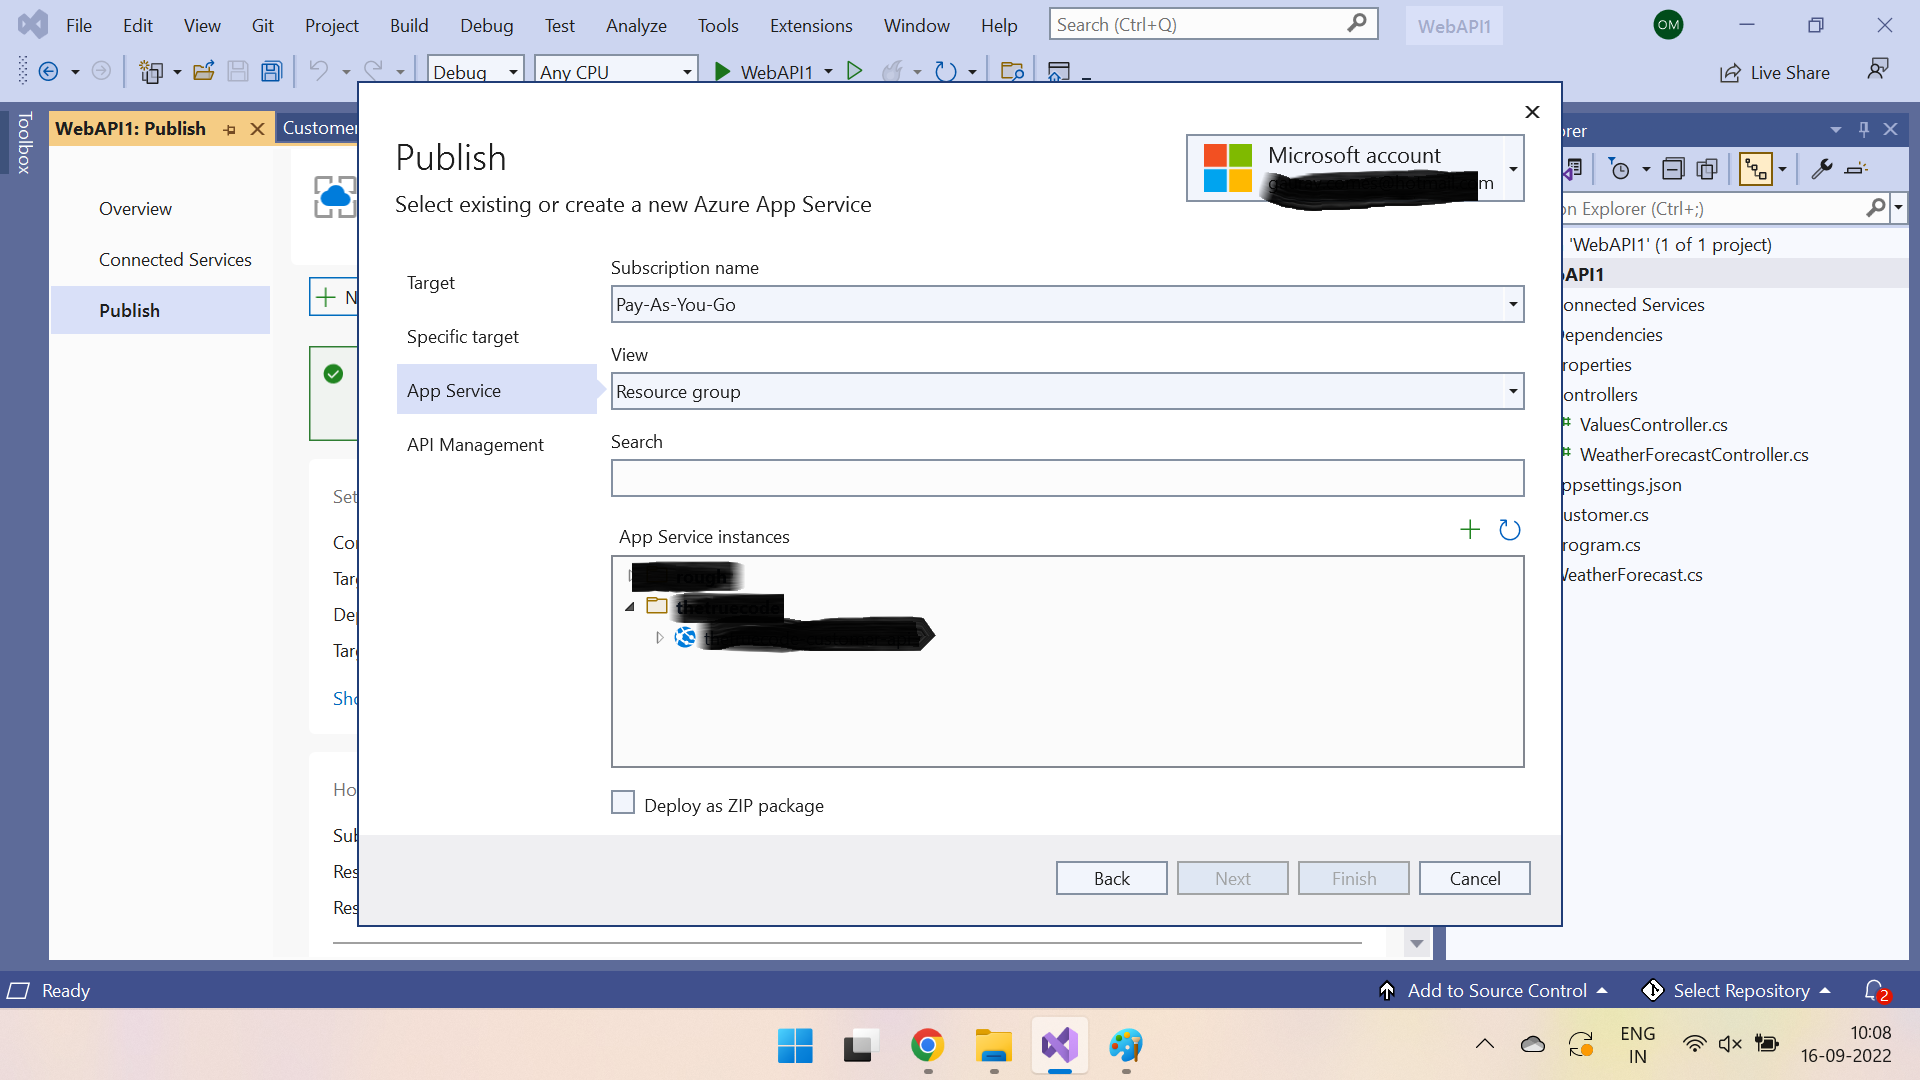
Select the app service instance you created for deployment -
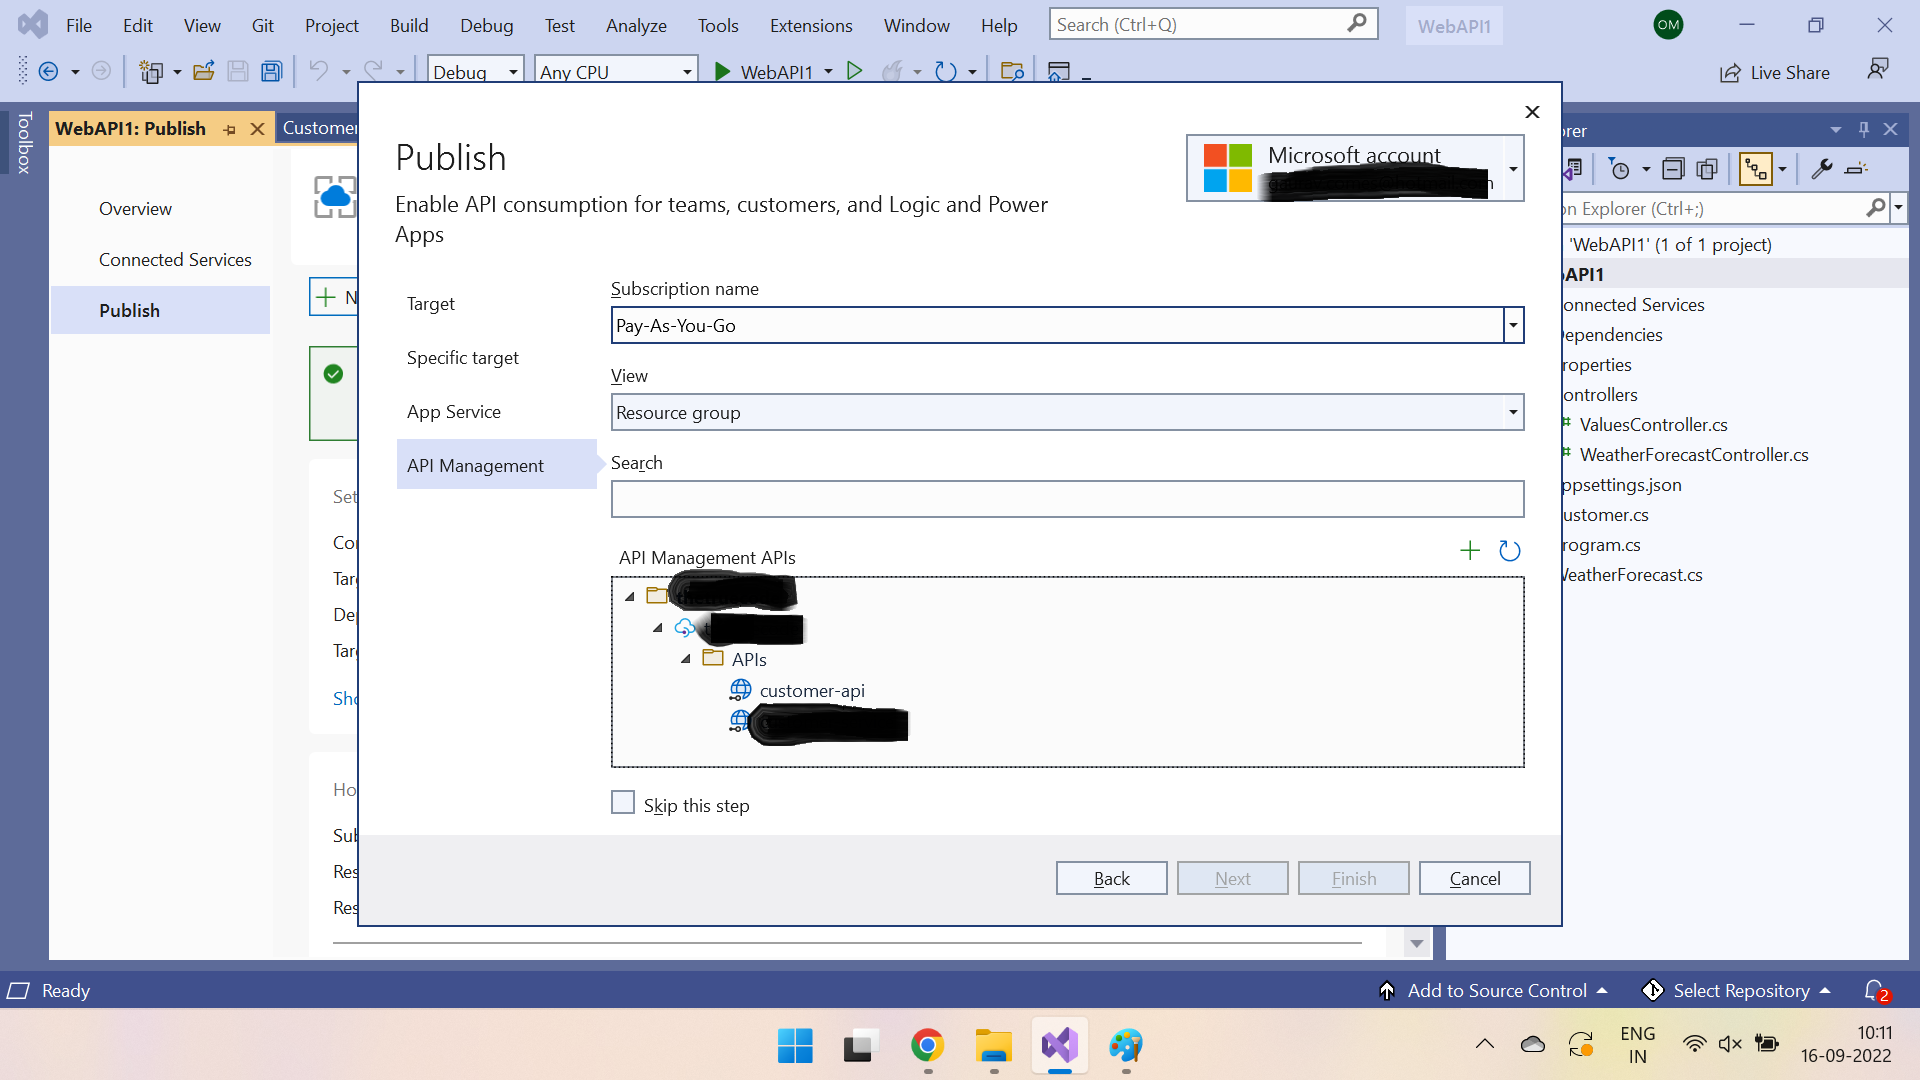
Select your newly created API in API management service -
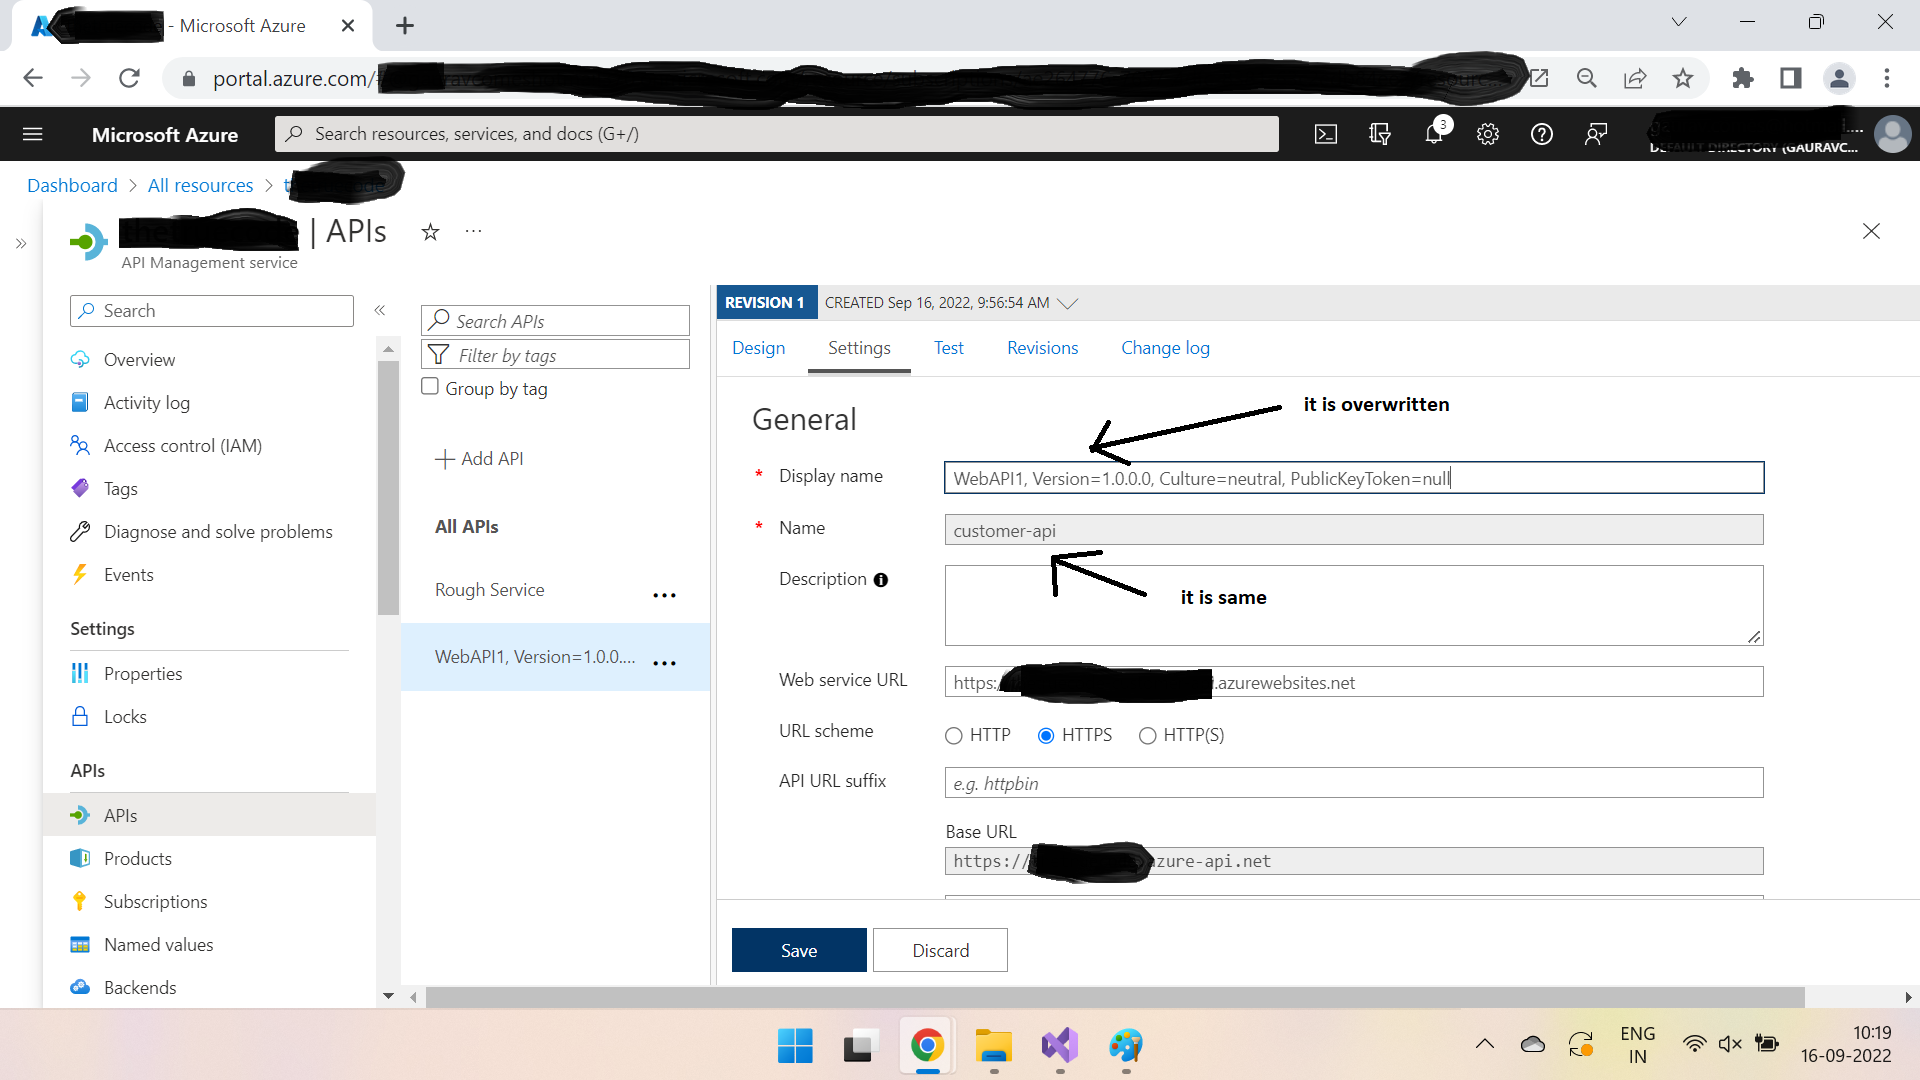
Once published, go back to Azure management service under APIs section & you will see that Customer API you created is not showing anymore & its showing WebAPI1 instead, as shown below -
Don't panic. It's the default behavior. Actually, your project's name is WebAP1 so while publishing it picks up the name of your project & overwrites it with the display name you created. If you click on WebAPI & go in settings tab, you would see that only Display name is changed & rest of the things are same, as shown below -
Let's go ahead & change the display name again to Customer API & click Save. You will see that the name has started to show up as previously -
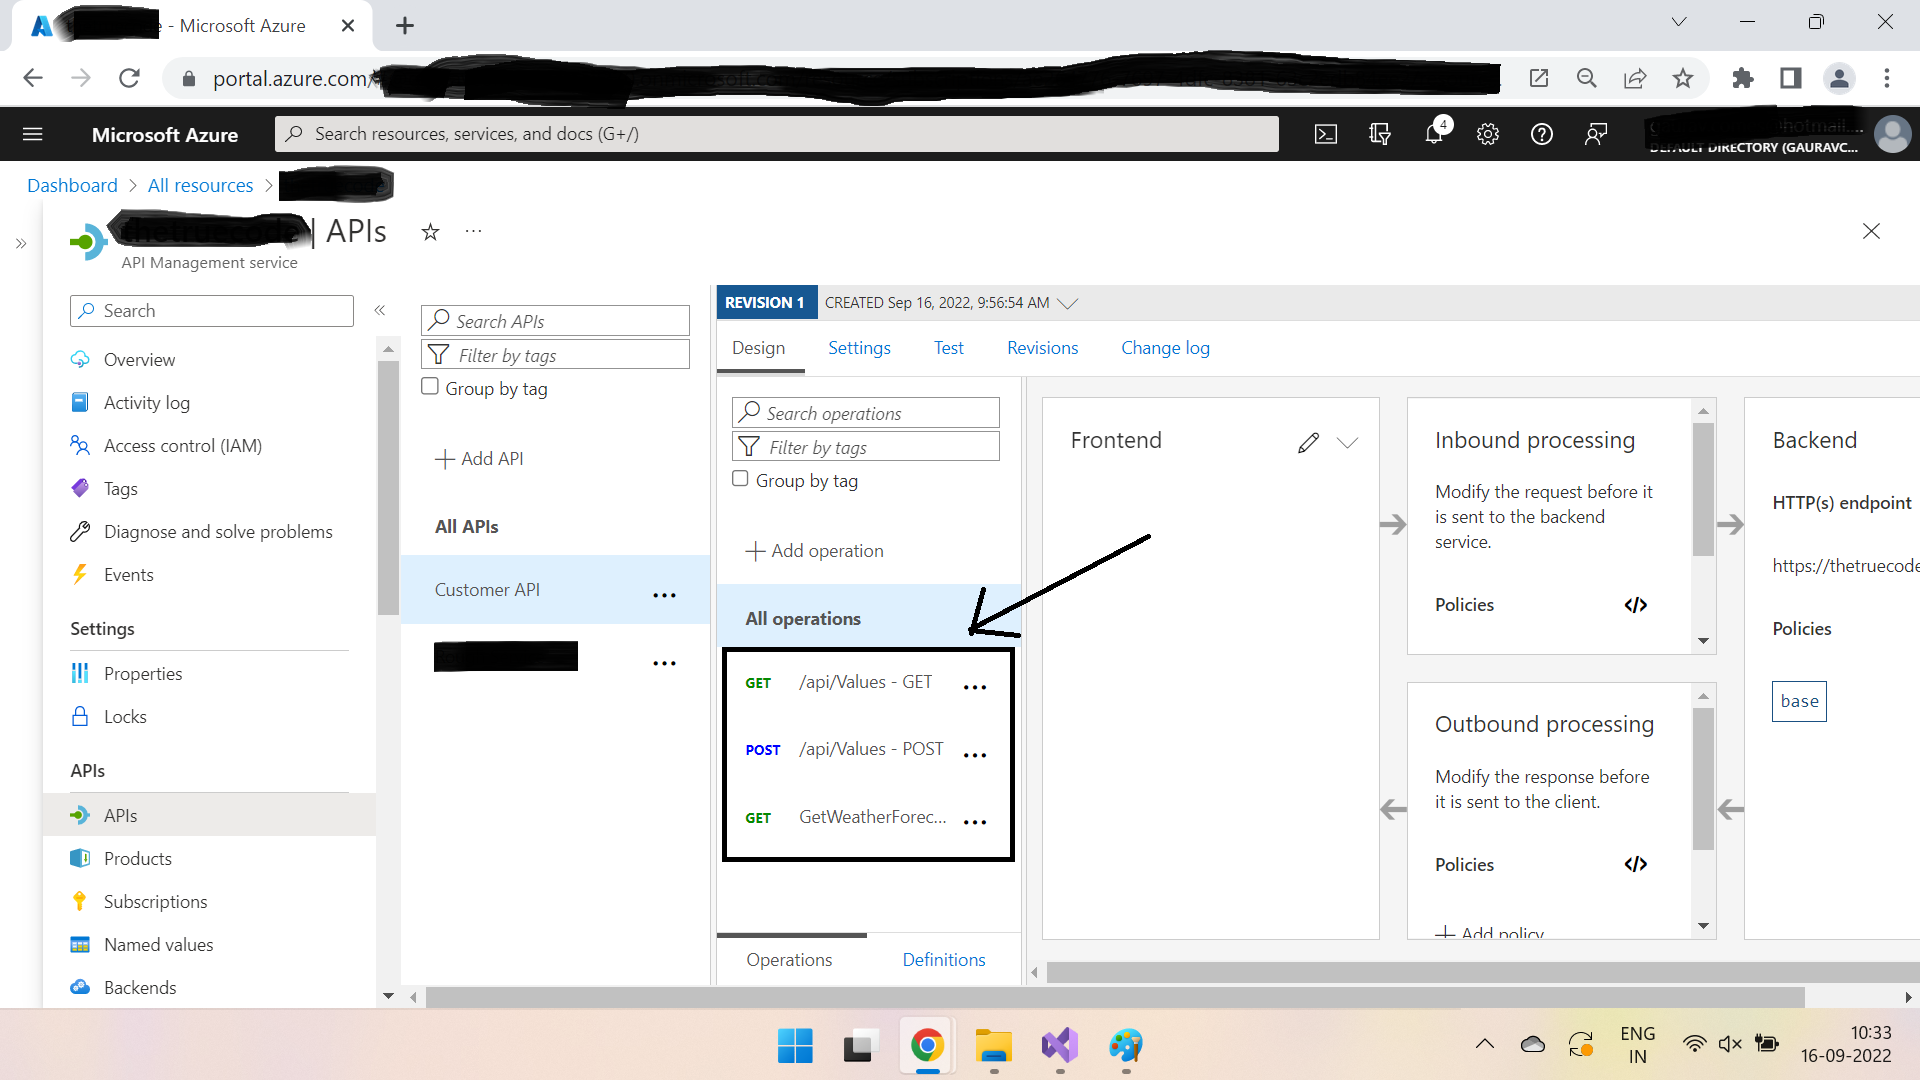
Click on Customer API & you will see that all the endpoints are shown in All operations tab. Let's try to play with those.
Click on Get Operation & then go under Test tab.
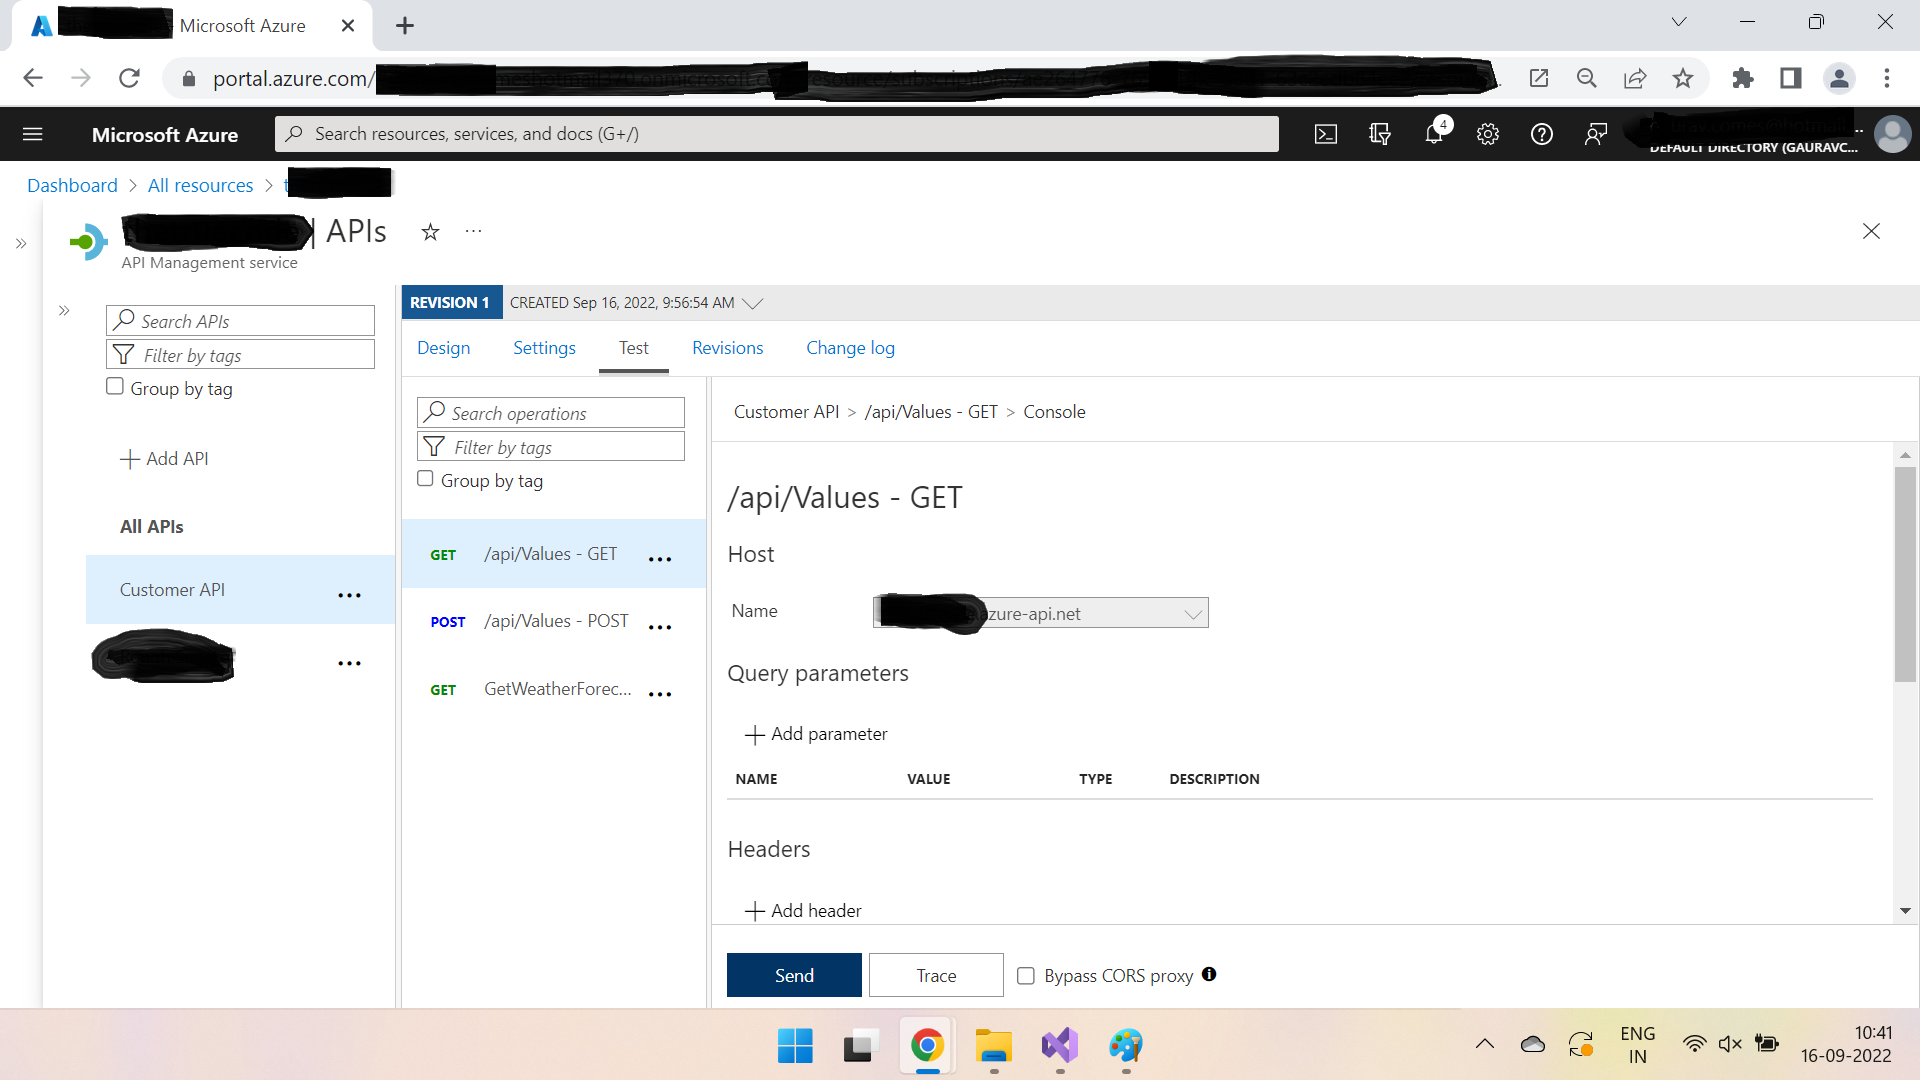
Here you can see that all the details related to this endpoint are shown. One can easily understand how to use this Api endpoint. Remember we discussed one challenge that if a new member(or existing) wants to understand any API, how he can do it without referring to any (boring) documentation or discussing with any (uncooperative) team member. Well, there is your answer. Using this API management, one can understand all the nitty-gritty of the required APIs.
Let's try to test get endpoint.
Once inside the test tab, click Send. You will see that it executes successfully & returns the response "thegetvaluefrom WebAP1", the same which we had incorporated in our API code. Now let's try to run it from outside of Azure portal.
Copy the request url from the screen.
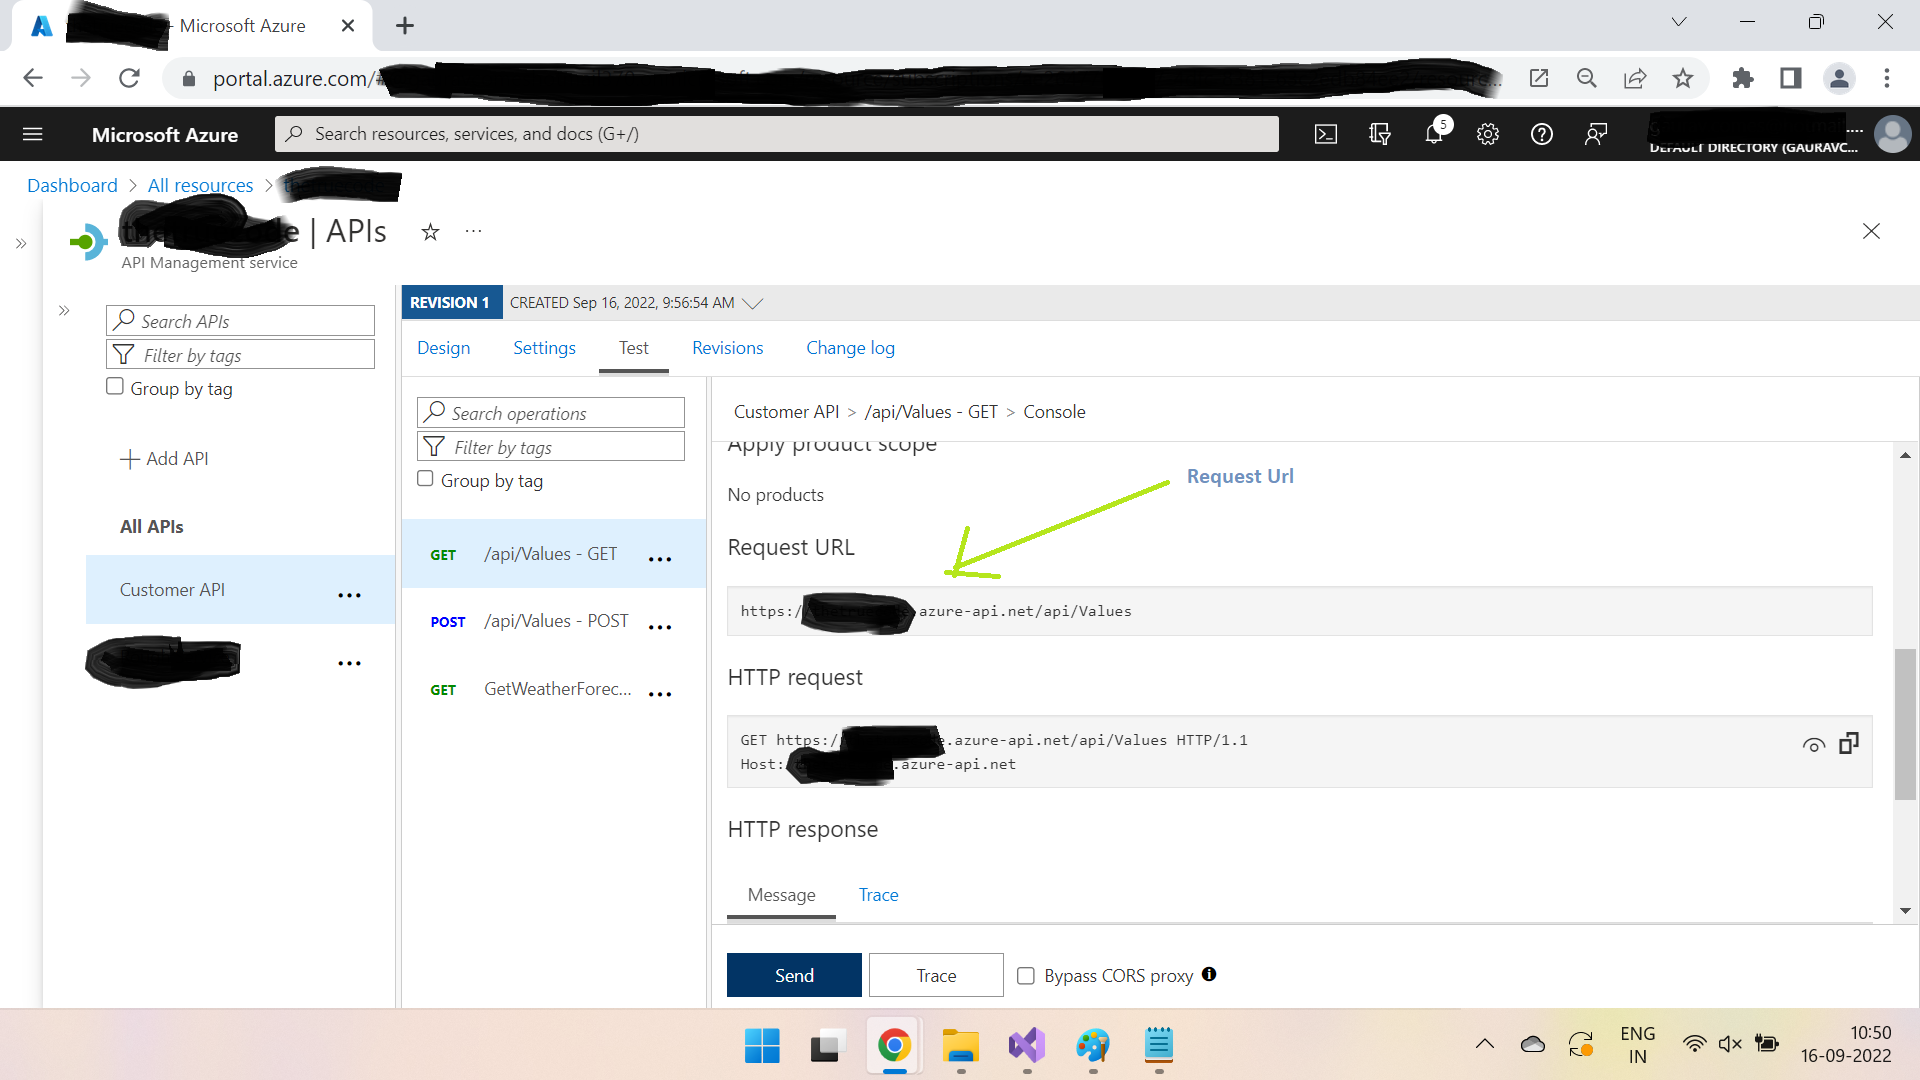
Open Postman. Run the copied URL & you will see below error -
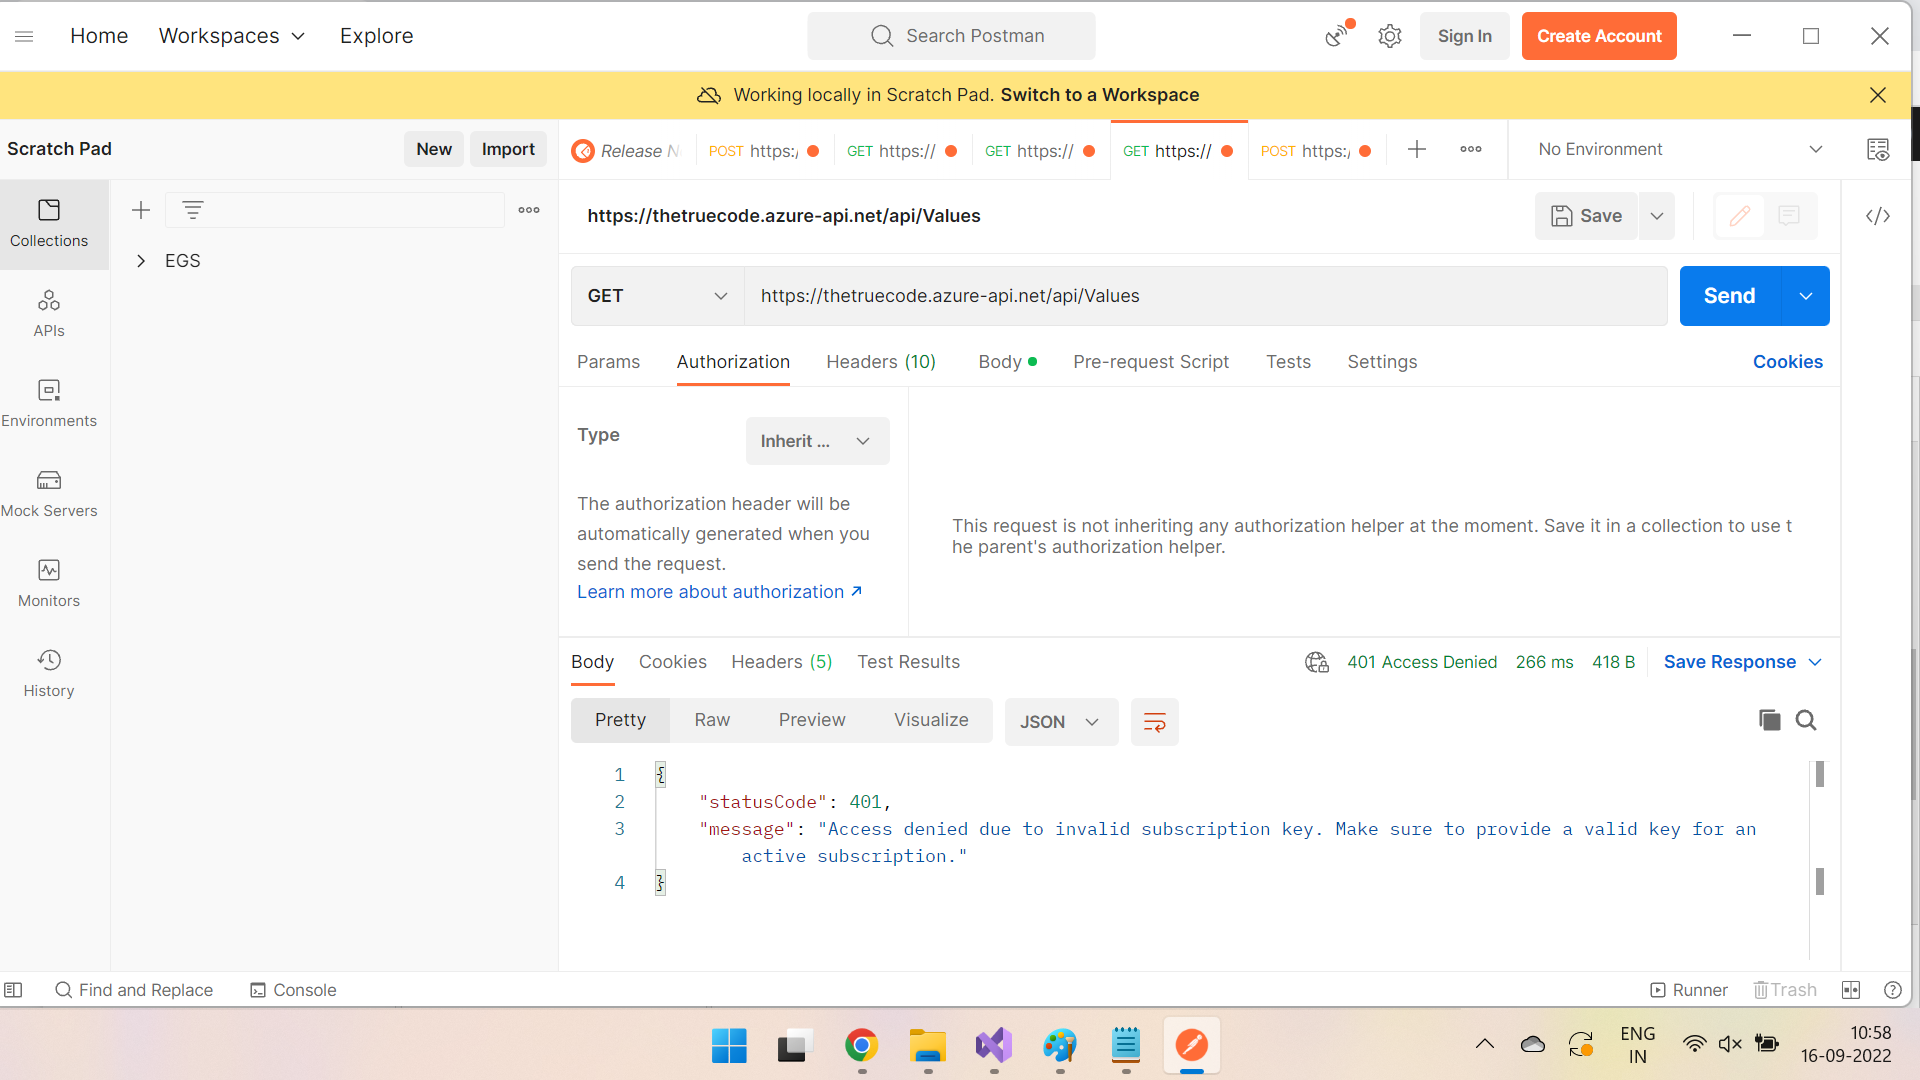
What happened! It is working fine in Azure portal but why not here? Actually, once the APIs are deployed inside an Azure management, by default they are required to run with a subscription key from outside of Azure boundaries. If we do not provide it, we won't be able to hit it. Let's create a subscription key for Customer Service.
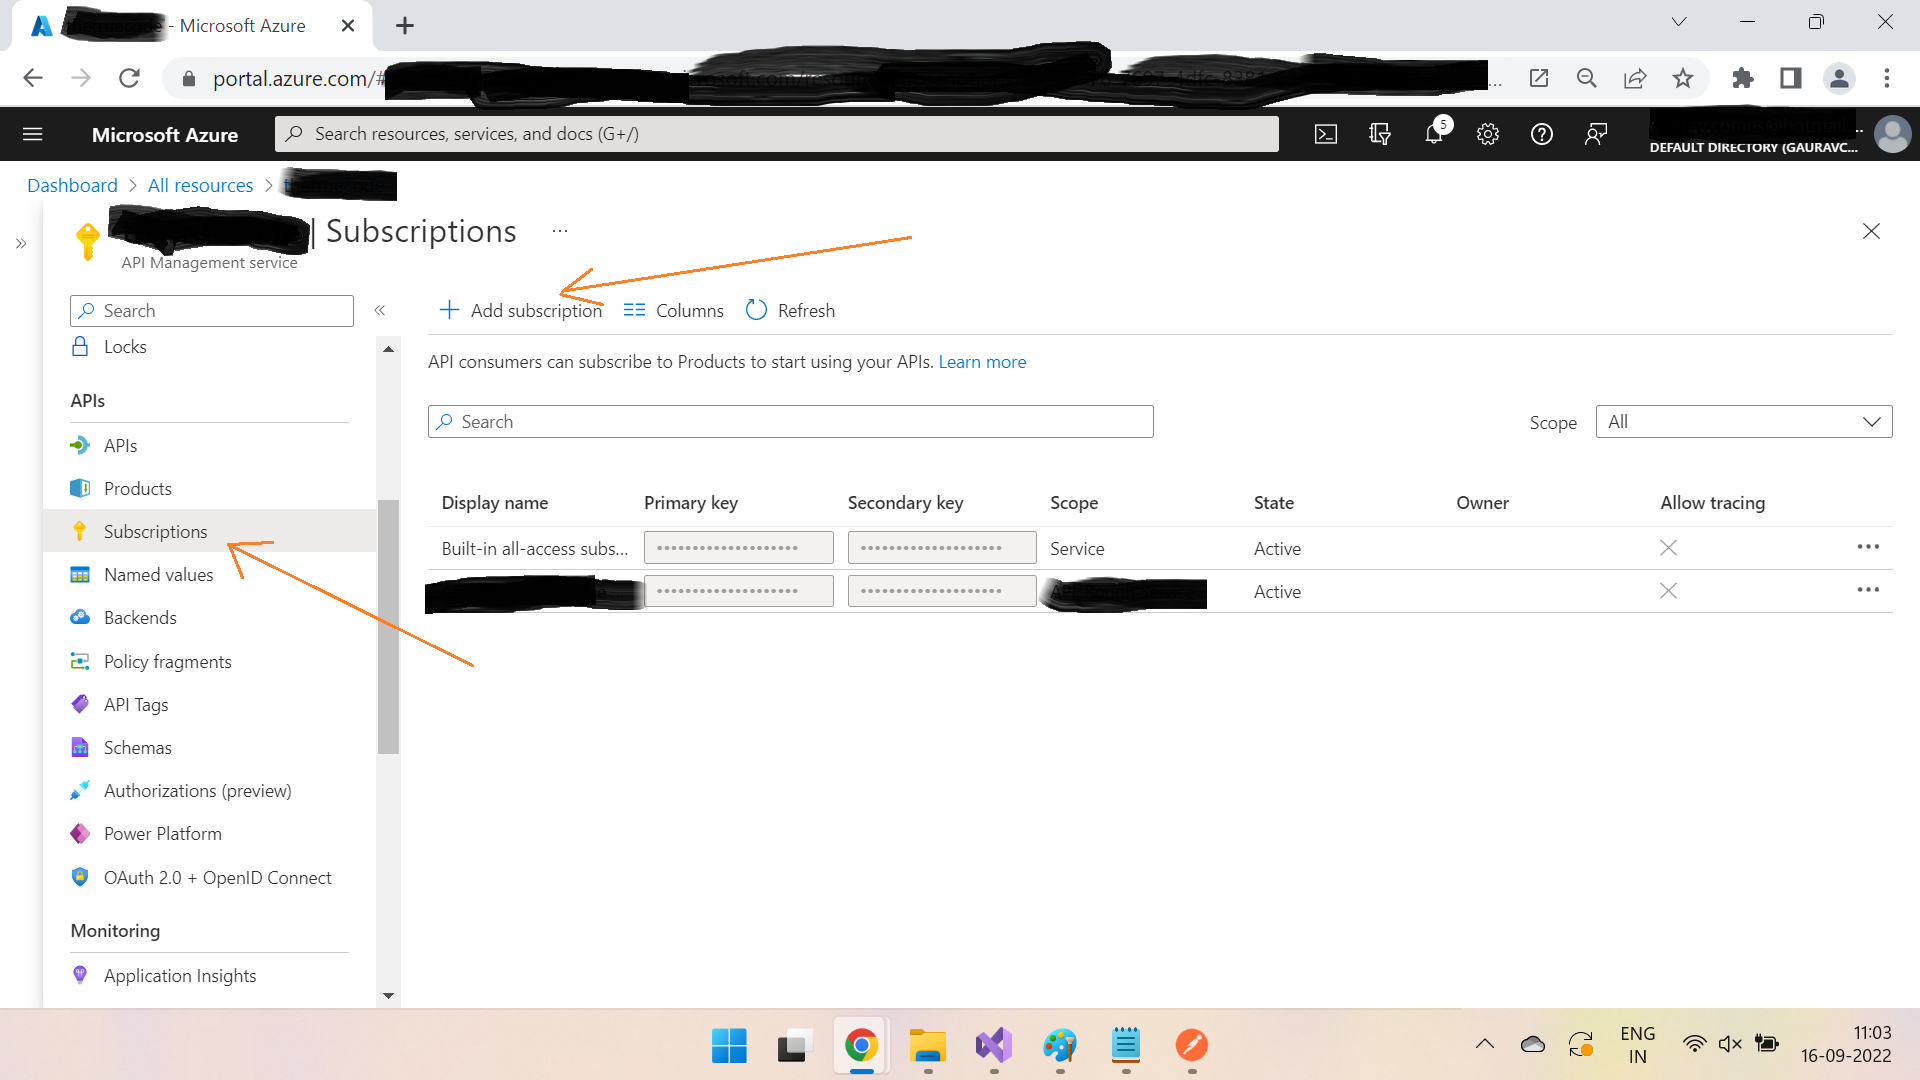
Go to Azure management service & click on Subscriptions & then Add Subscription
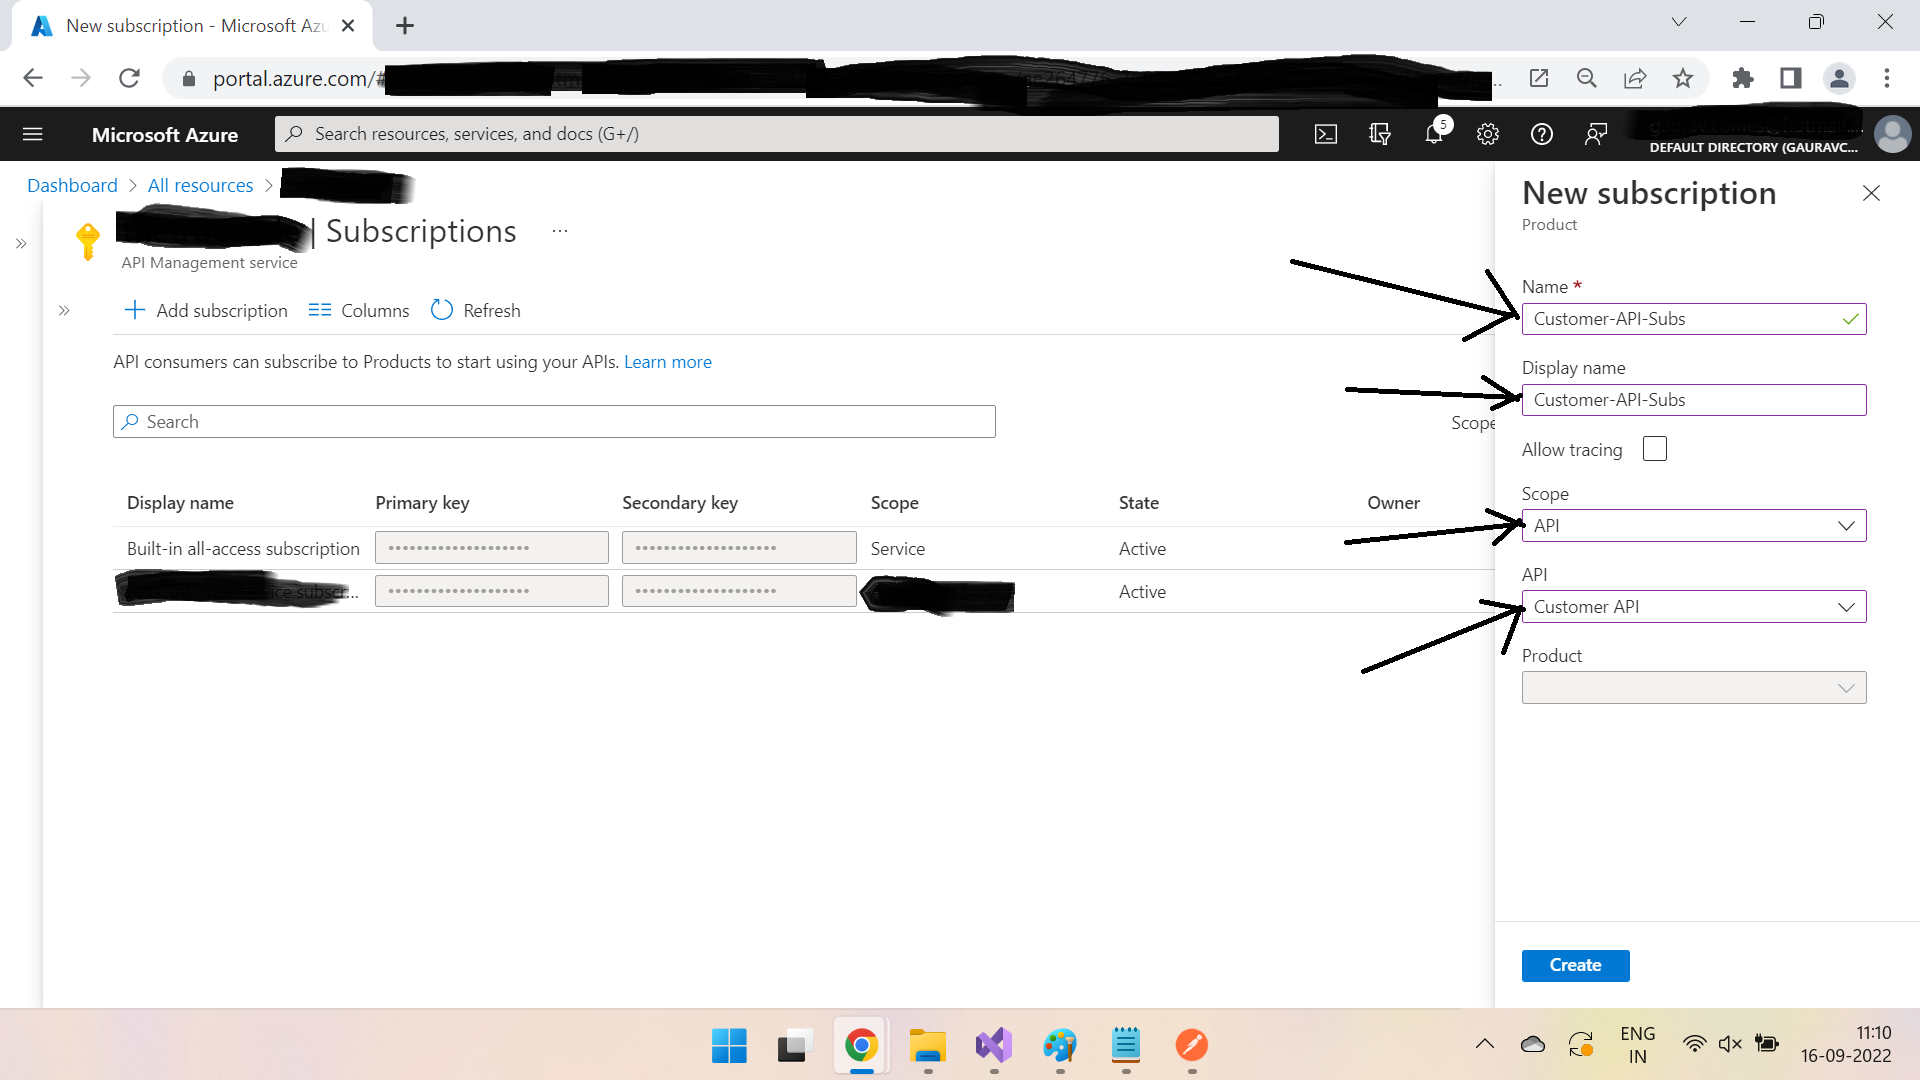
You will see the screen for adding subscription. Fill all the fields as shown below -
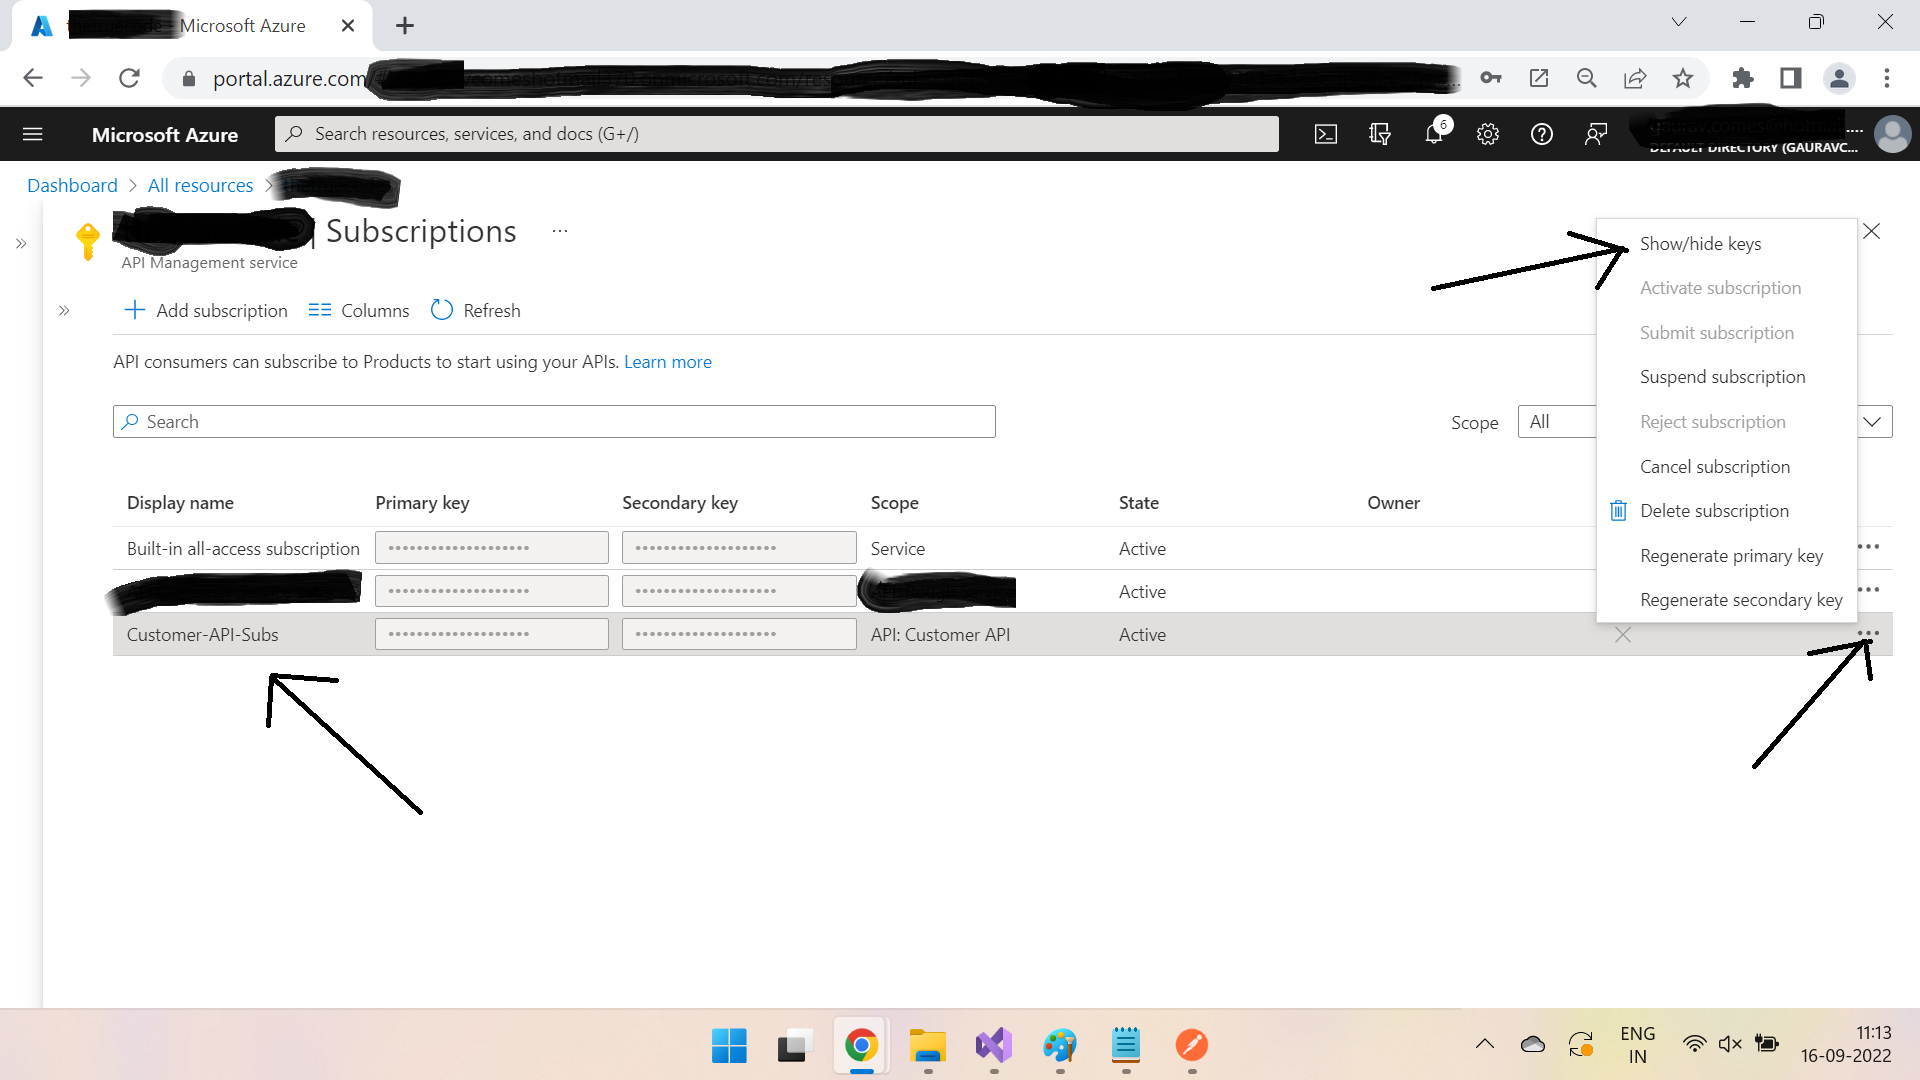
Click on Create & new subscription will be created for Customer API. Copy the subscription key as per shown below -
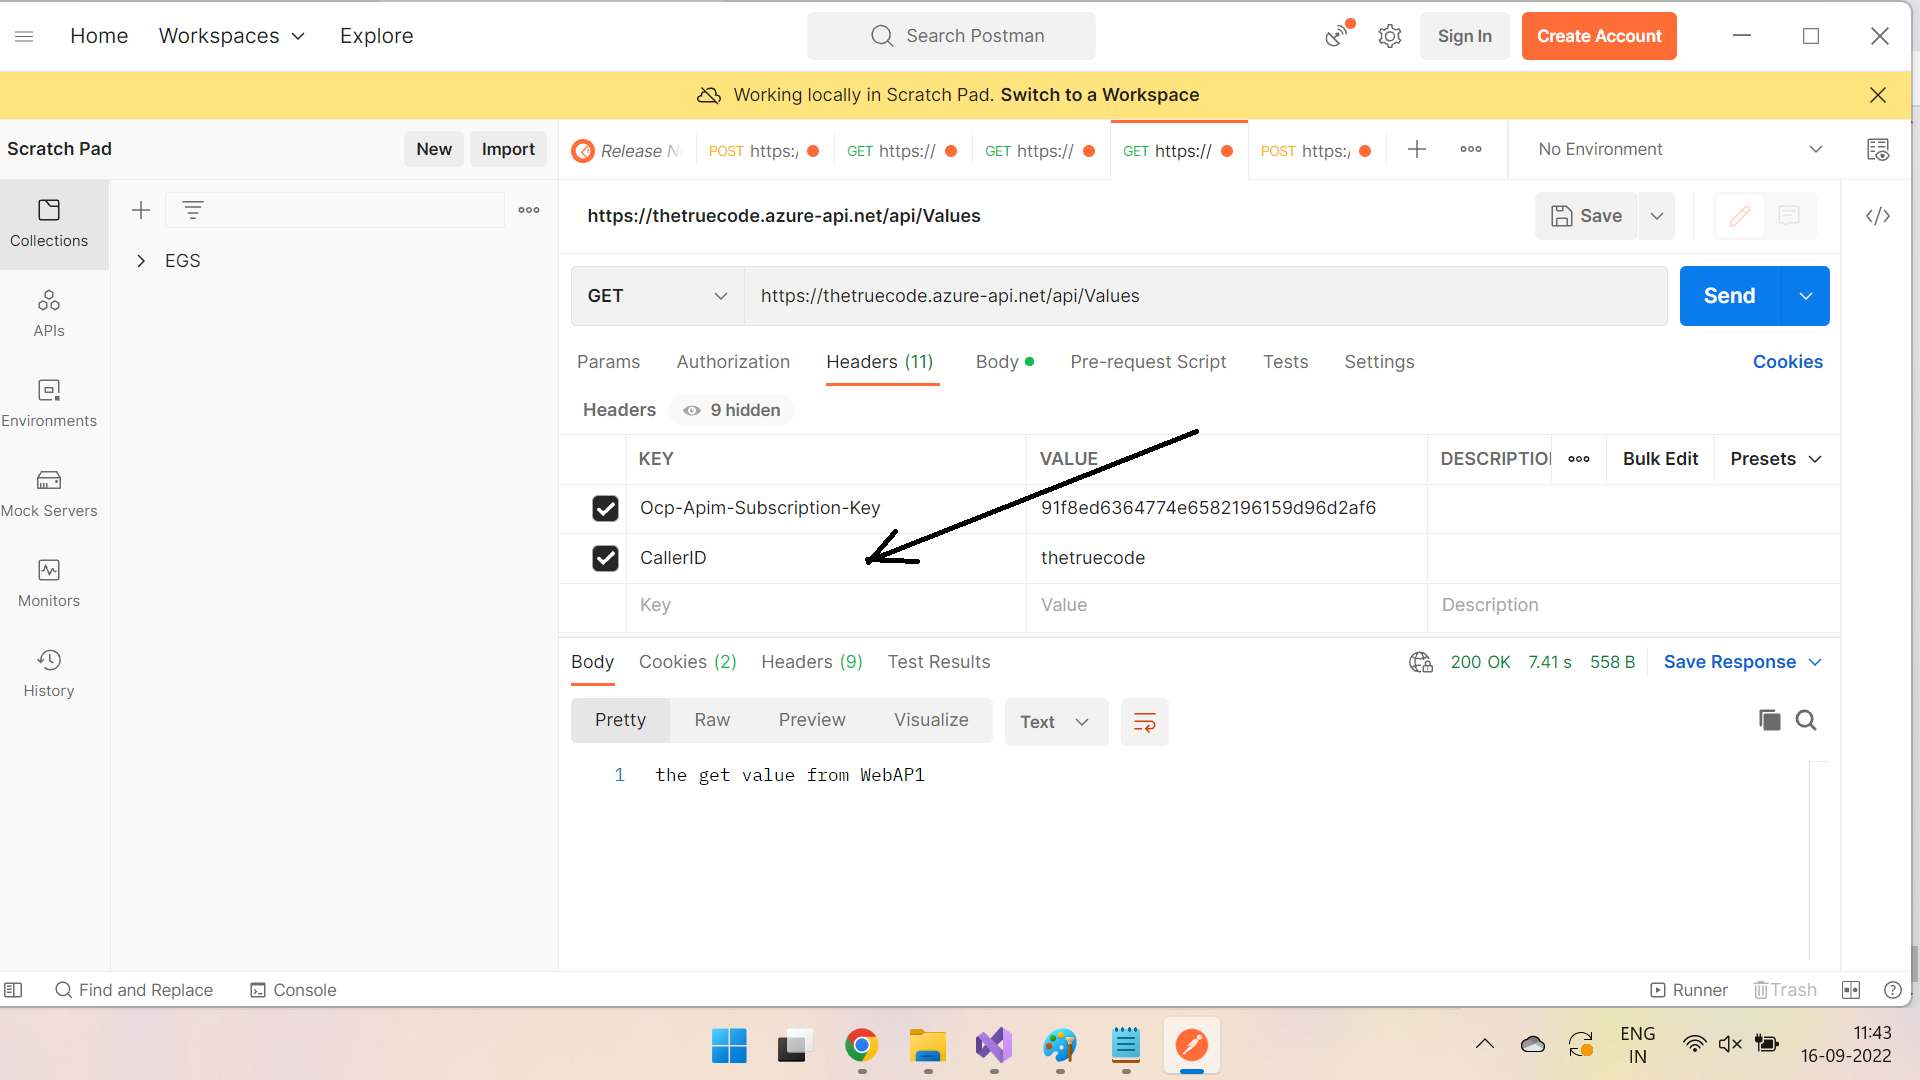
Once the subscription key is copied, go to your previously opened postman application & open headers tab. Add header Ocp-Apim-Subscription-Key & value as your subscription key, as shown below -
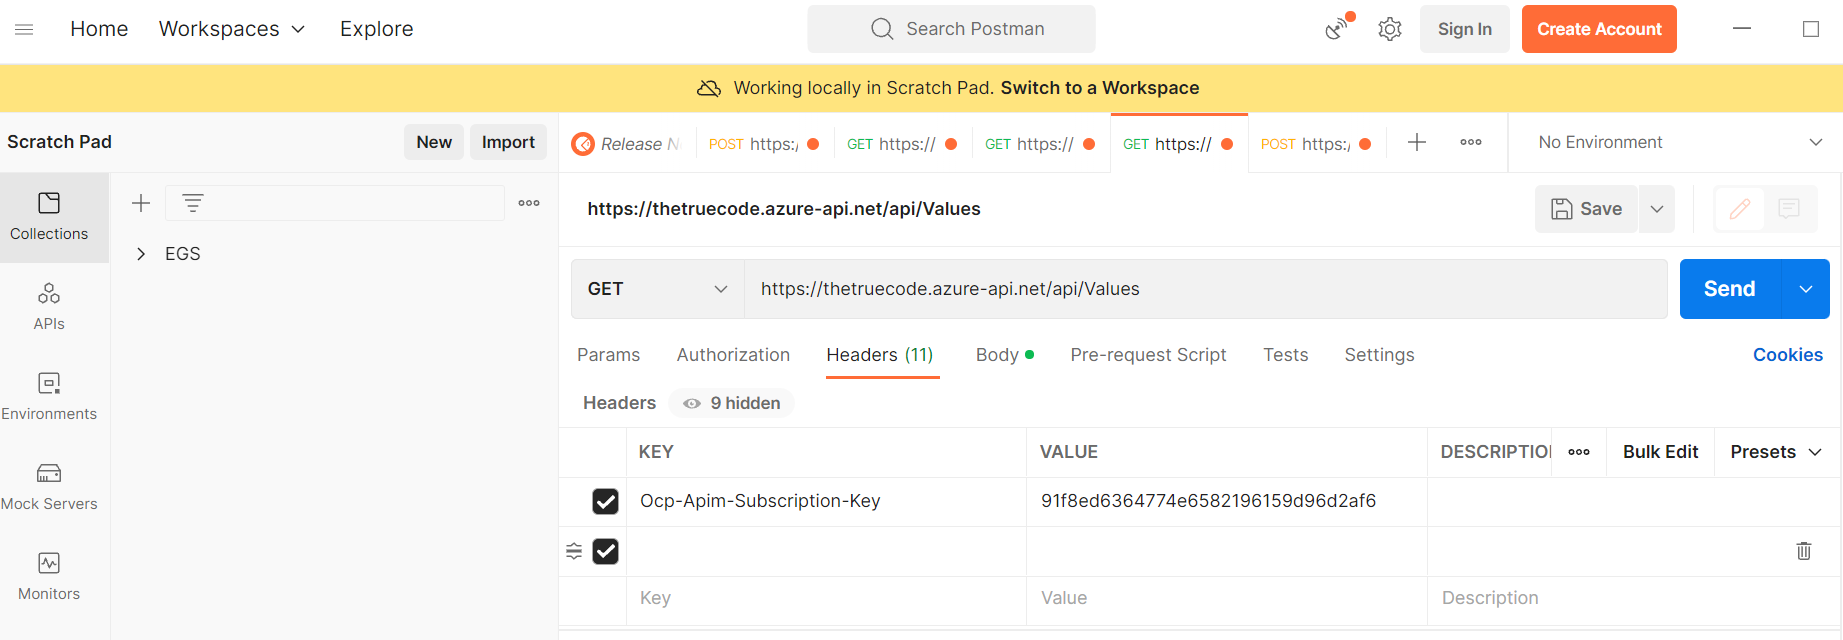
Hit Send & voilà! The API is returning the expected response.
Our API is ready to be used from external with the use of the subscription api. Now suppose a requirement comes that if any input request to Customer API does not contain header CallerID with value thetruecode, it should return 401 response. In normal scenarios, we will need to implement this logic in our code & then deploy it. Let's see how we can do it quickly at API management level without even touching the code!
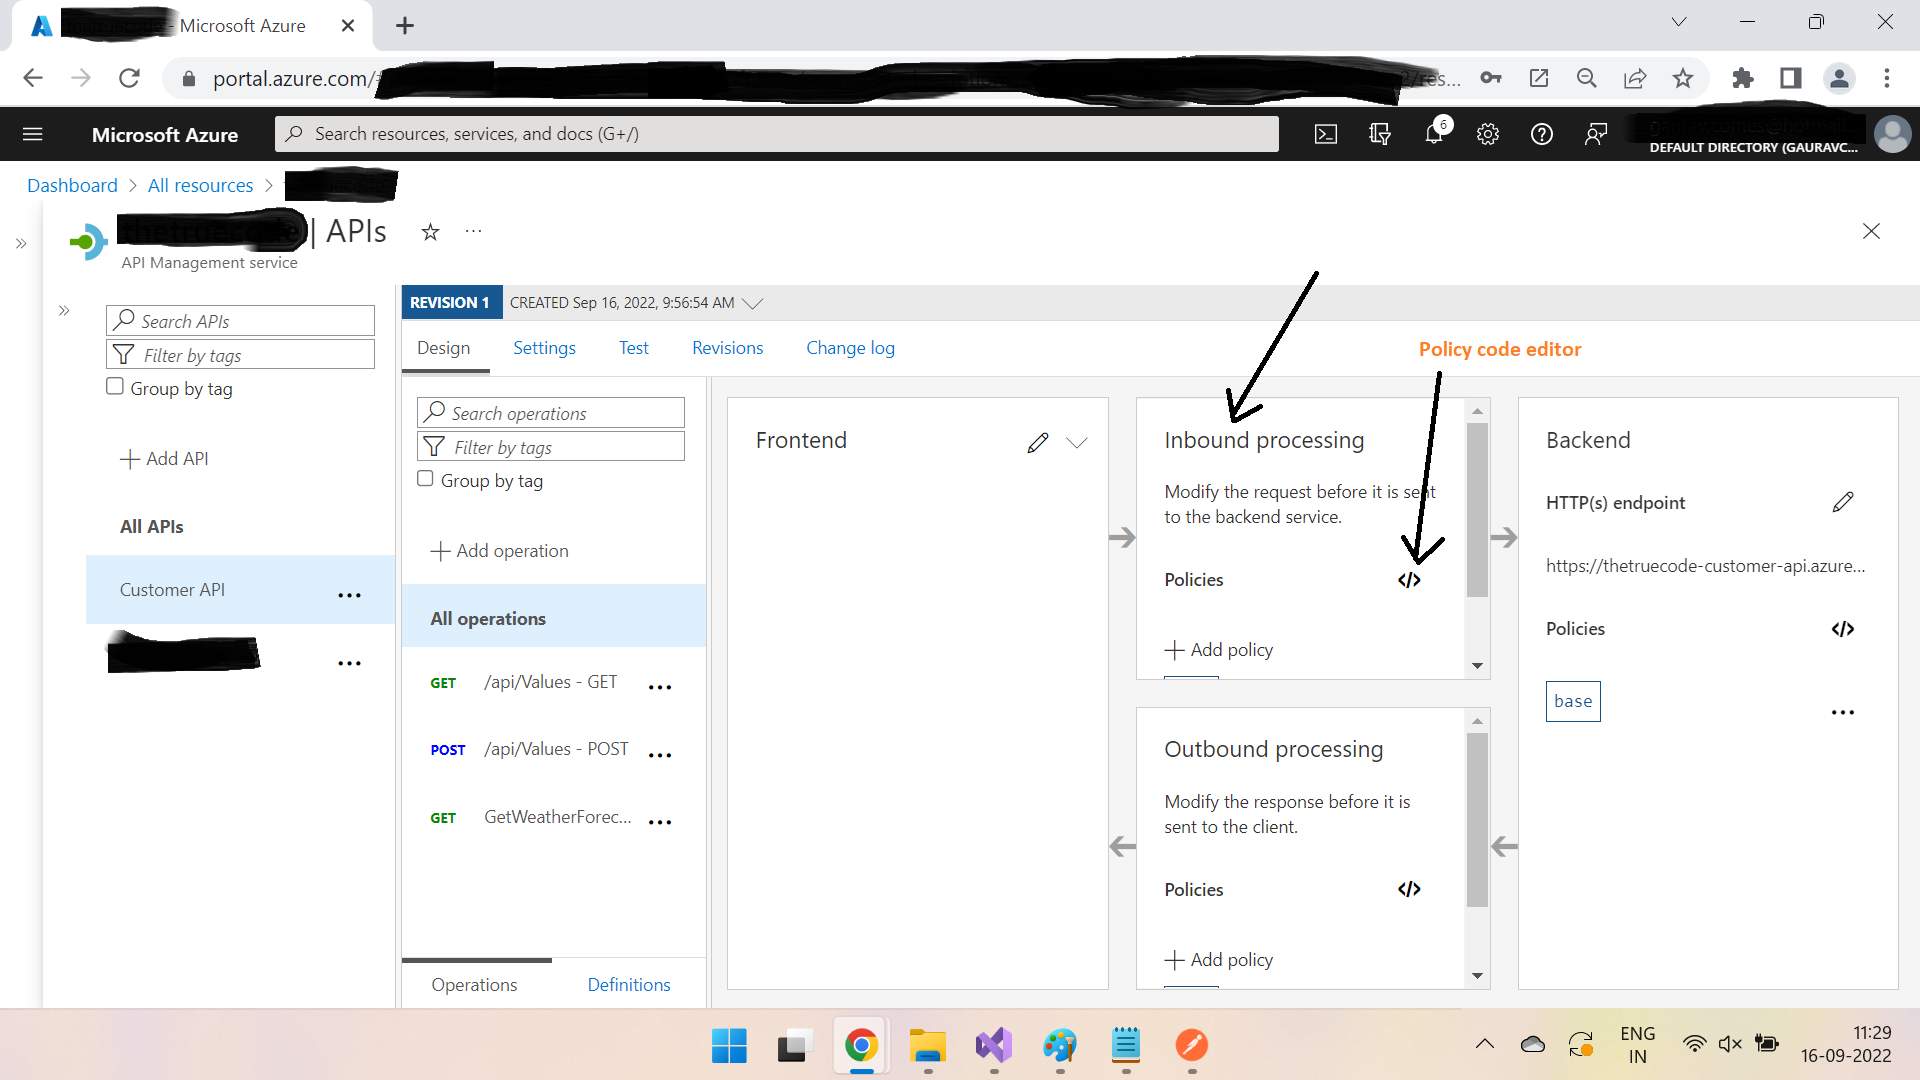
Go to your API management service under APIs section & click on Customer API. Then click on Policy code editor under Inbound processing section. Below is a screenshot for better clarity -
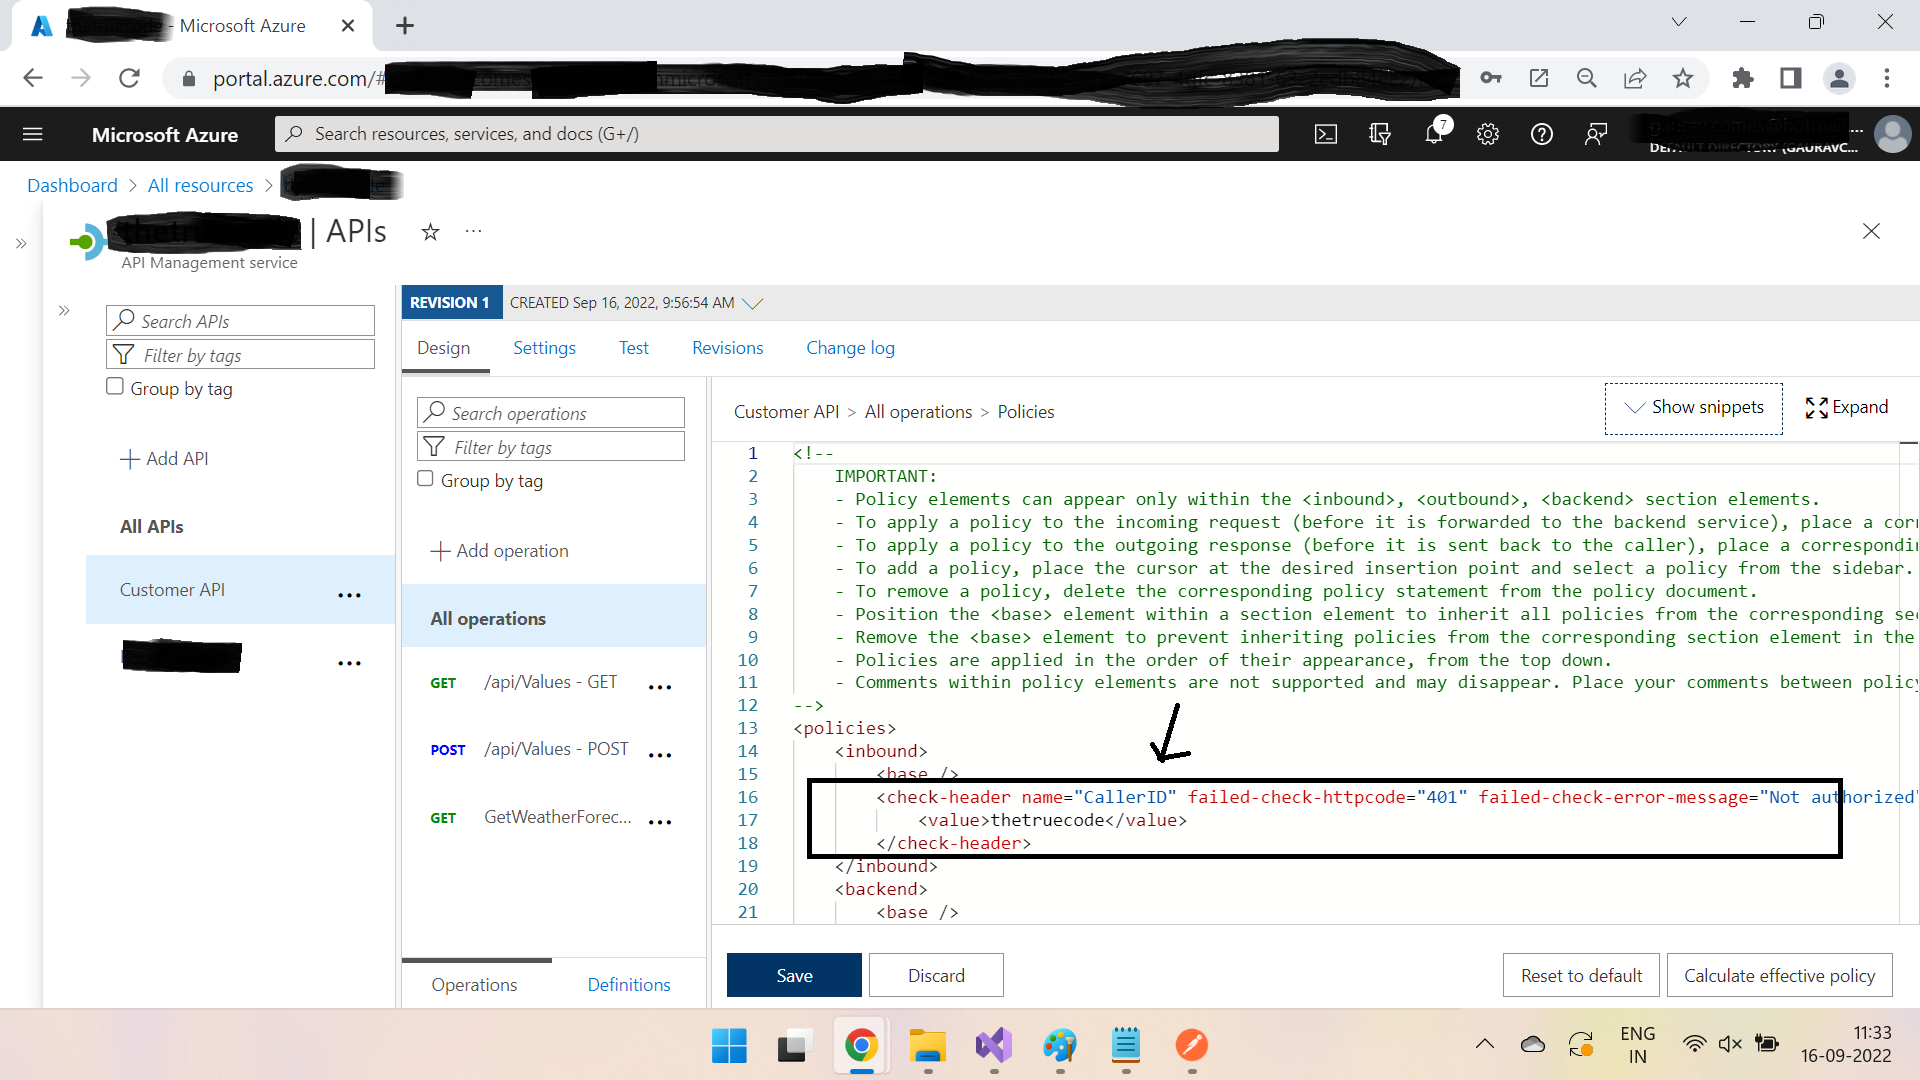
After clicking on Policy code editor, add below code inside inbound node & click Save -
<check-header name="CallerID" failed-check-httpcode="401" failed-check-error-message="Not authorized" ignore-case="false">
    <value>thetruecode</value>
</check-header>
as shown below -
After saving, go to your postman app & again try to hit the Get endpoint. You will see following response -
{
    "statusCode": 401,
    "message": "Not authorized"
}
Why? Because we have applied a policy that if there is no CallerID header with value thetruecode in the request, return 401 response. Now let's add the required header and hit it again. You will get expected 200 response now.
See? We have not incorporated any code, no deployment & just did a quick change at a single place & it will work for all endpoints inside Customer Service! Mission accomplished!
Conclusion
You have seen how we can deploy any API behind an Azure API management service & how we can run & apply polices on them without even touching the code. Though there are lots of other features & capabilities which Azure API management offers but doing these basic things will provide you at least a conceptual idea why & how to use an API management.